Installing VPN on an OpenWrt Router
Step 1. Install OpenWrt on the Router
- Check that your router supports OpenWrt 23.05.0 or later:
- https://openwrt.org/toh/start
- https://firmware-selector.openwrt.org (alternative resource)
- Install OpenWrt 23.05.0 or later on your router, ensuring you select the appropriate version for your specific router model.
You cannot use this guide to set up VPN on a router running OpenWrt 22.03.x or older.
Step 2. Install AmneziaWG on the OpenWrt Router
Before you begin, turn off the VPN on the device you will use to connect to the router.
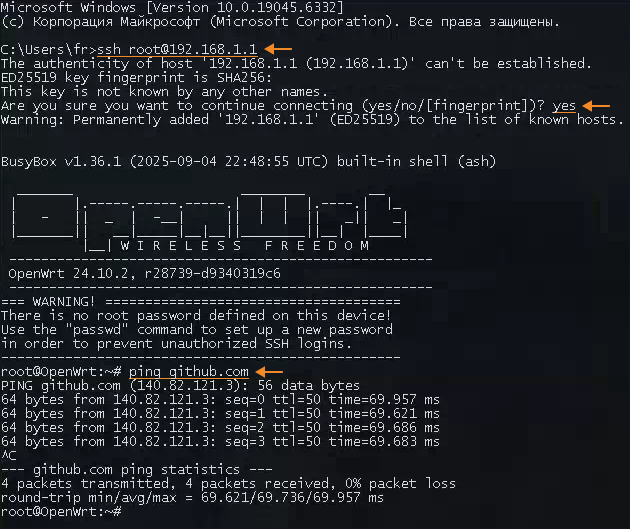
- Open a command line/terminal and run
ssh [email protected], where192.168.1.1is your router's IP address. Depending on your network settings, your router may use a different IP address, for example,192.168.0.1. - Confirm that you want to continue by entering
yes. - Run
ping github.comto make sure the router has internet access.
- Run the following command to install the AmneziaWG package on your router:
sh <(wget -O - https://raw.githubusercontent.com/Slava-Shchipunov/awg-openwrt/refs/heads/master/amneziawg-install.sh)
If the script fails with an error such as Connecting to 2606:... / Connection error: Connection failed while attempting to connect to a GitHub IPv6 address, rerun the command and force IPv4:
sh <(wget -4 -O - https://raw.githubusercontent.com/Slava-Shchipunov/awg-openwrt/refs/heads/master/amneziawg-install.sh)
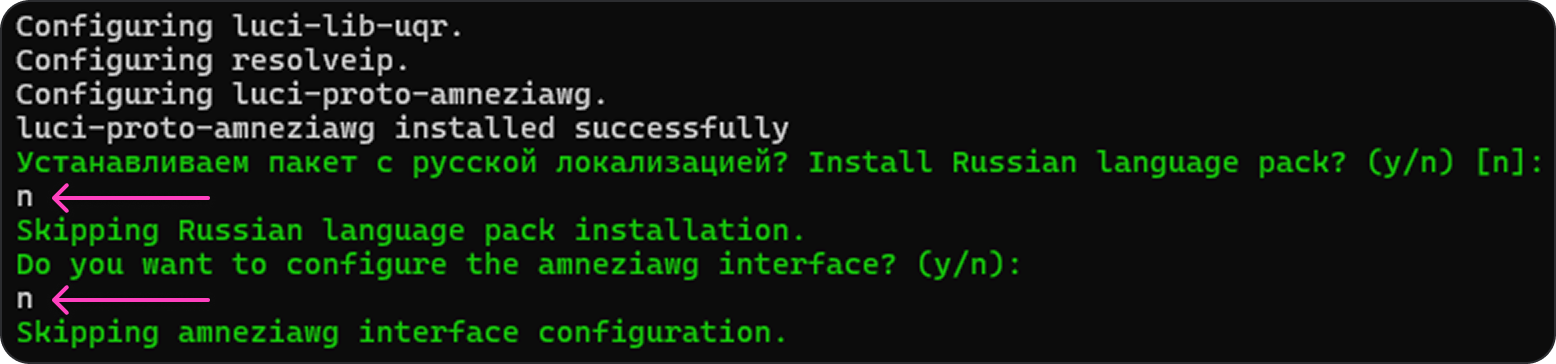
- When the script finishes, enter
n.
Special thanks to Slava Shchipunov for creating the script!
For more details about the script, see the author’s repository on GitHub.
Step 3. Create a VPN Connection on the Router
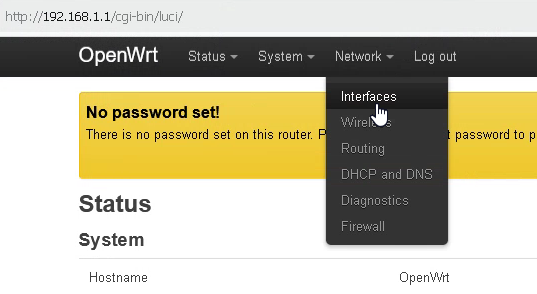
- Open the router settings in a web browser. To do this, enter the router's IP address in the address bar, for example,
192.168.1.1. - Go to Network → Interfaces.
- Click Add new interface.
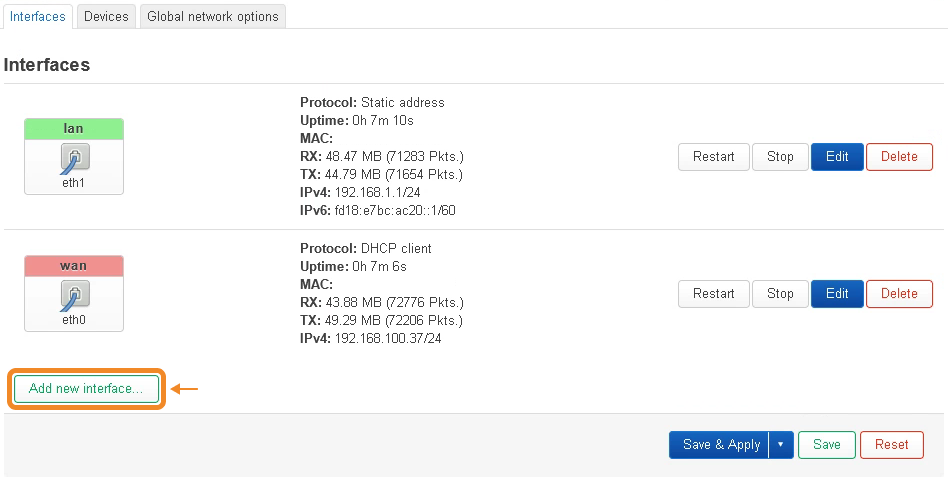
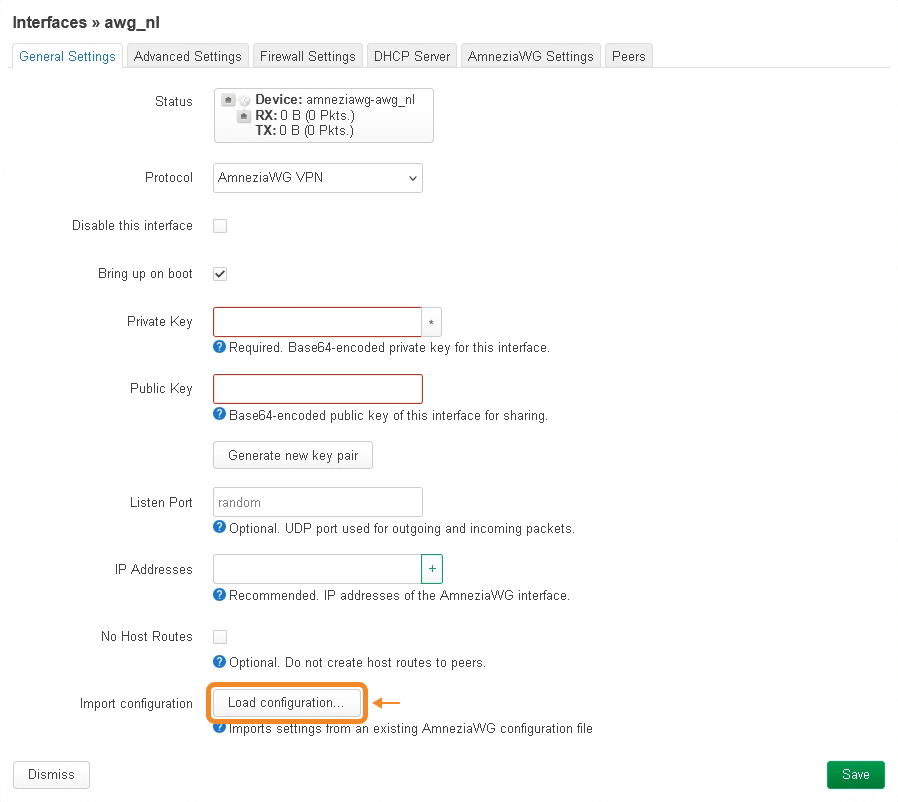
- Enter any name for your VPN interface, select the AmneziaWG VPN protocol, and click Create interface.
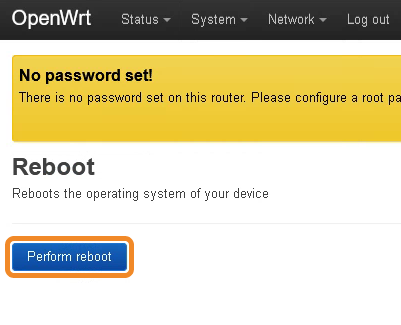
If AmneziaWG VPN isn't listed in the protocol dropdown, reboot the router: hover over System in the top menu → Reboot → Perform reboot.

- Click Load configuration.
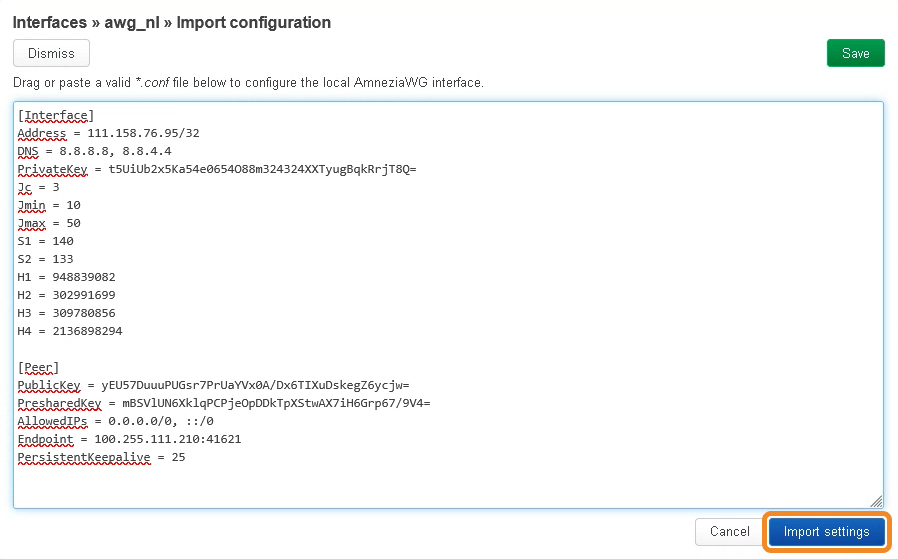
- Paste the full contents of the configuration file or drag and drop the file into the window, then click Import settings.
How to get a configuration file:
- in your Personal Dashboard if you have an Amnezia Premium subscription
- in the AmneziaVPN app, if you have your own server — share the connection using the AmneziaWG protocol, and select AmneziaWG native format
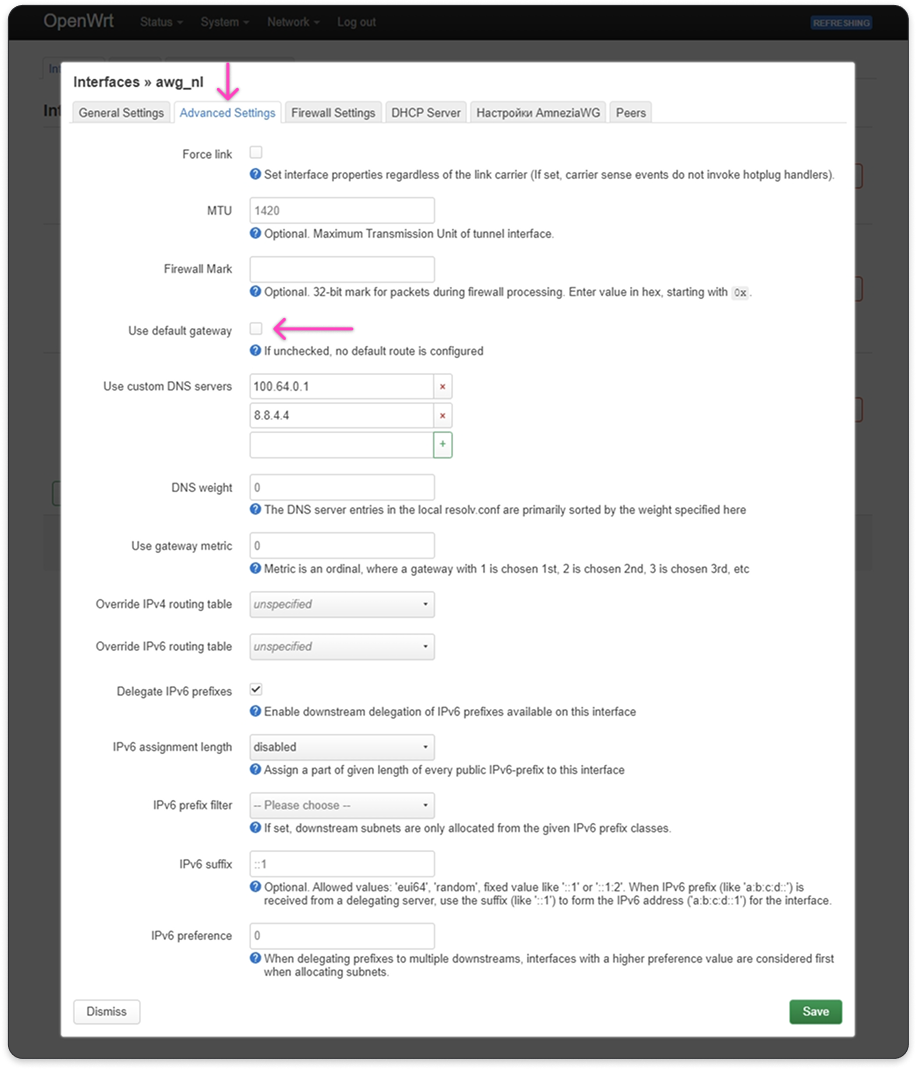
- Go to the Advanced Settings tab and clear the Use default gateway checkbox.
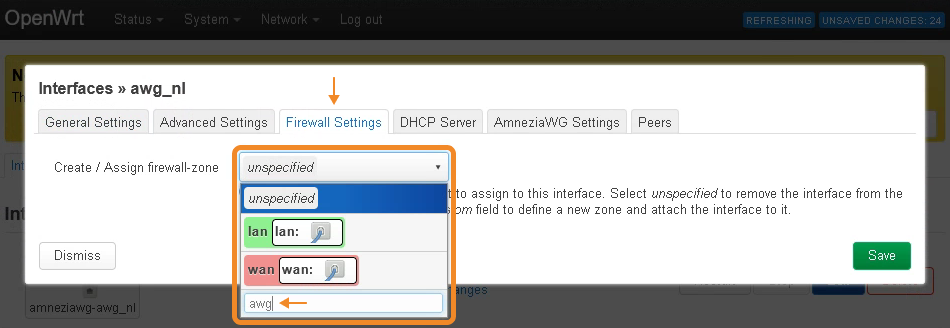
- Go to the Firewall Settings tab. In Create / Assign firewall-zone, enter any name for the new zone (for example,
awg) in the field below the list of existing zones, then press Enter.
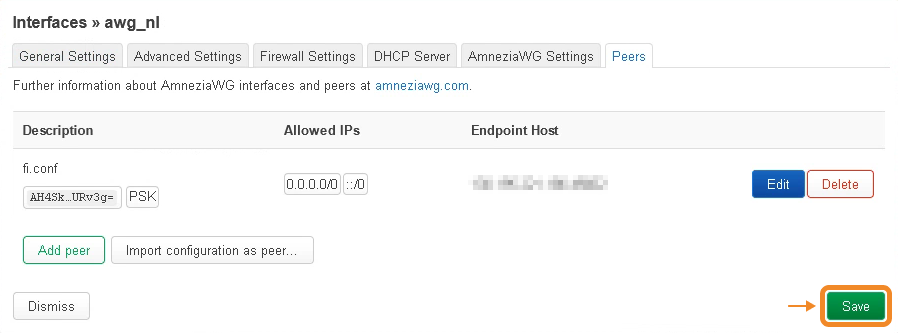
- Go to the Peers tab and click Edit next to the imported configuration.
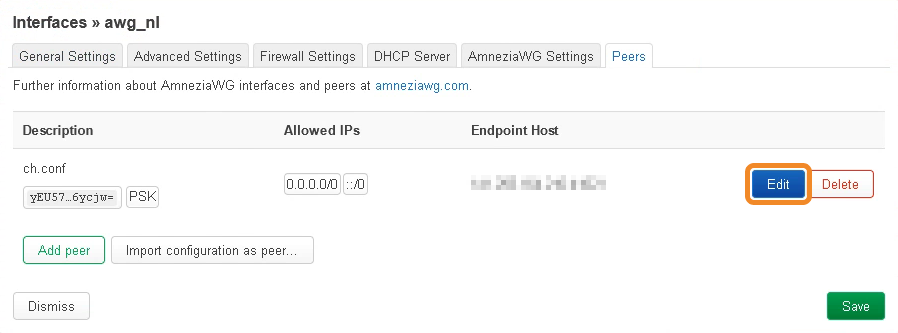
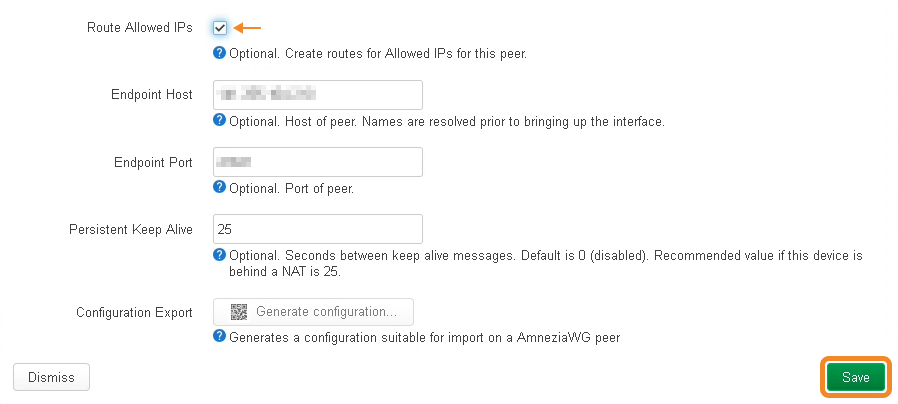
- Enable Route Allowed IPs, click Save, then click Save again.

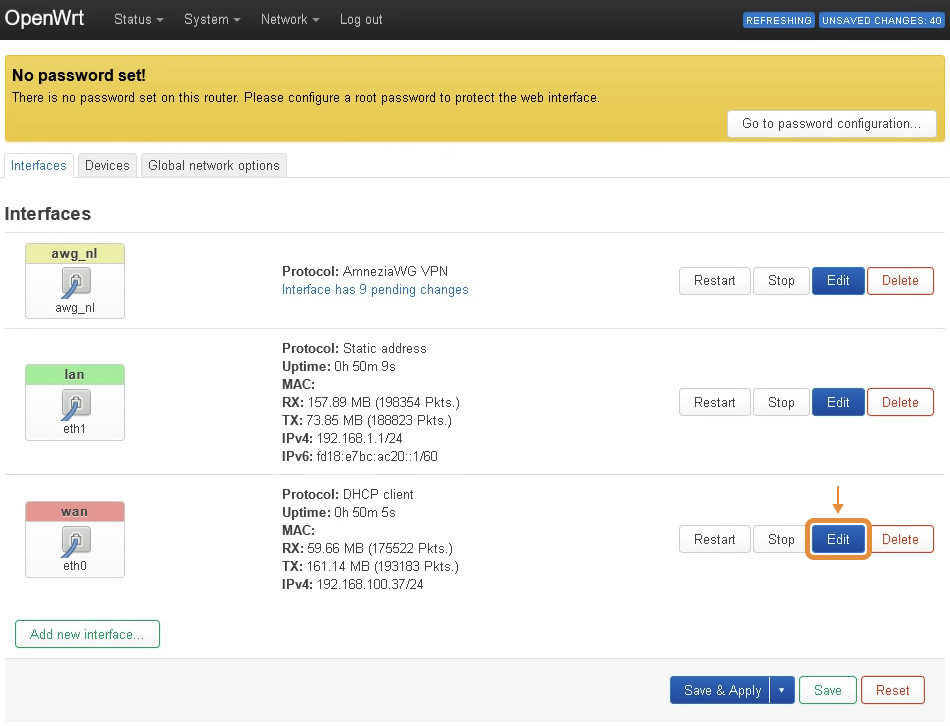
- Click Edit next to the wan zone.
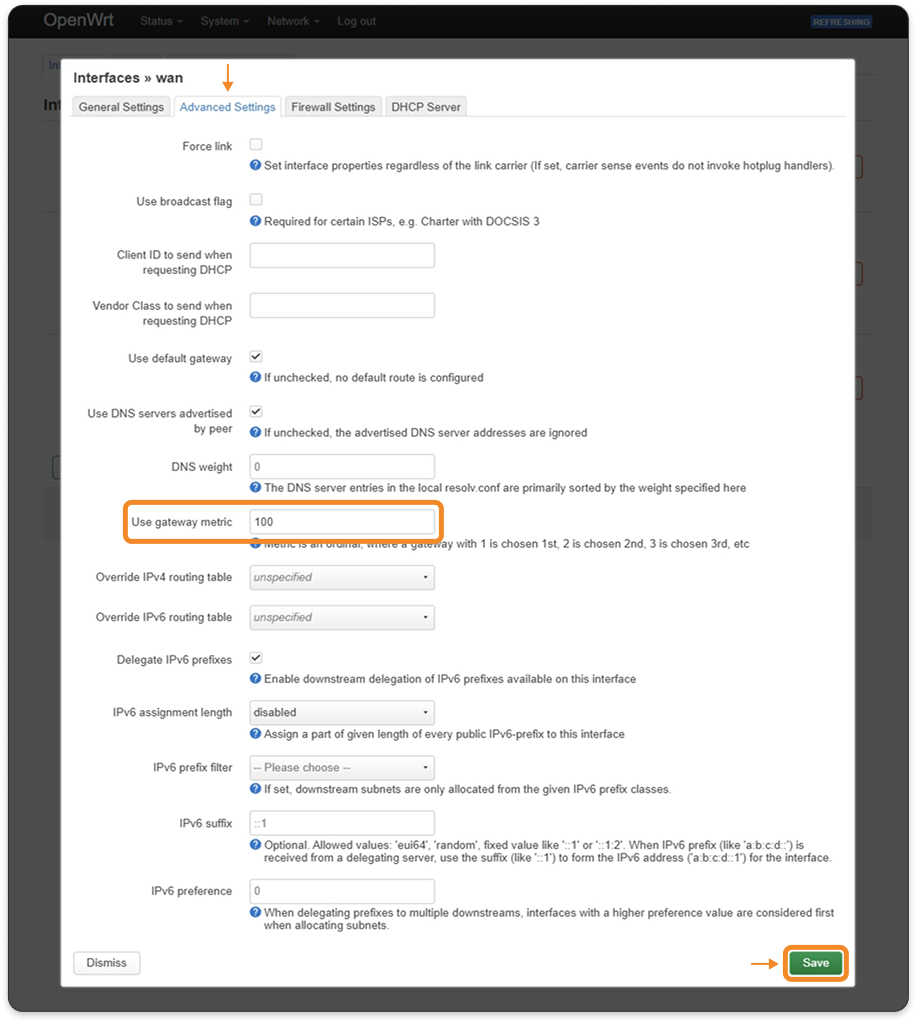
- Go to the Advanced Settings tab, set Use gateway metric to
100, and click Save.
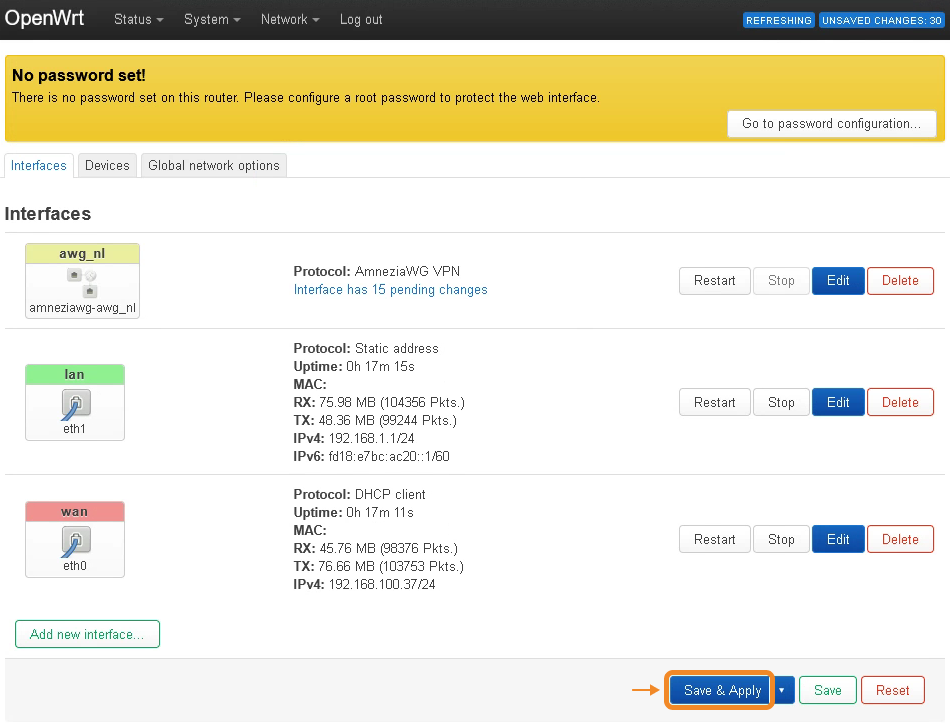
- On the Interfaces tab, click Save & Apply.
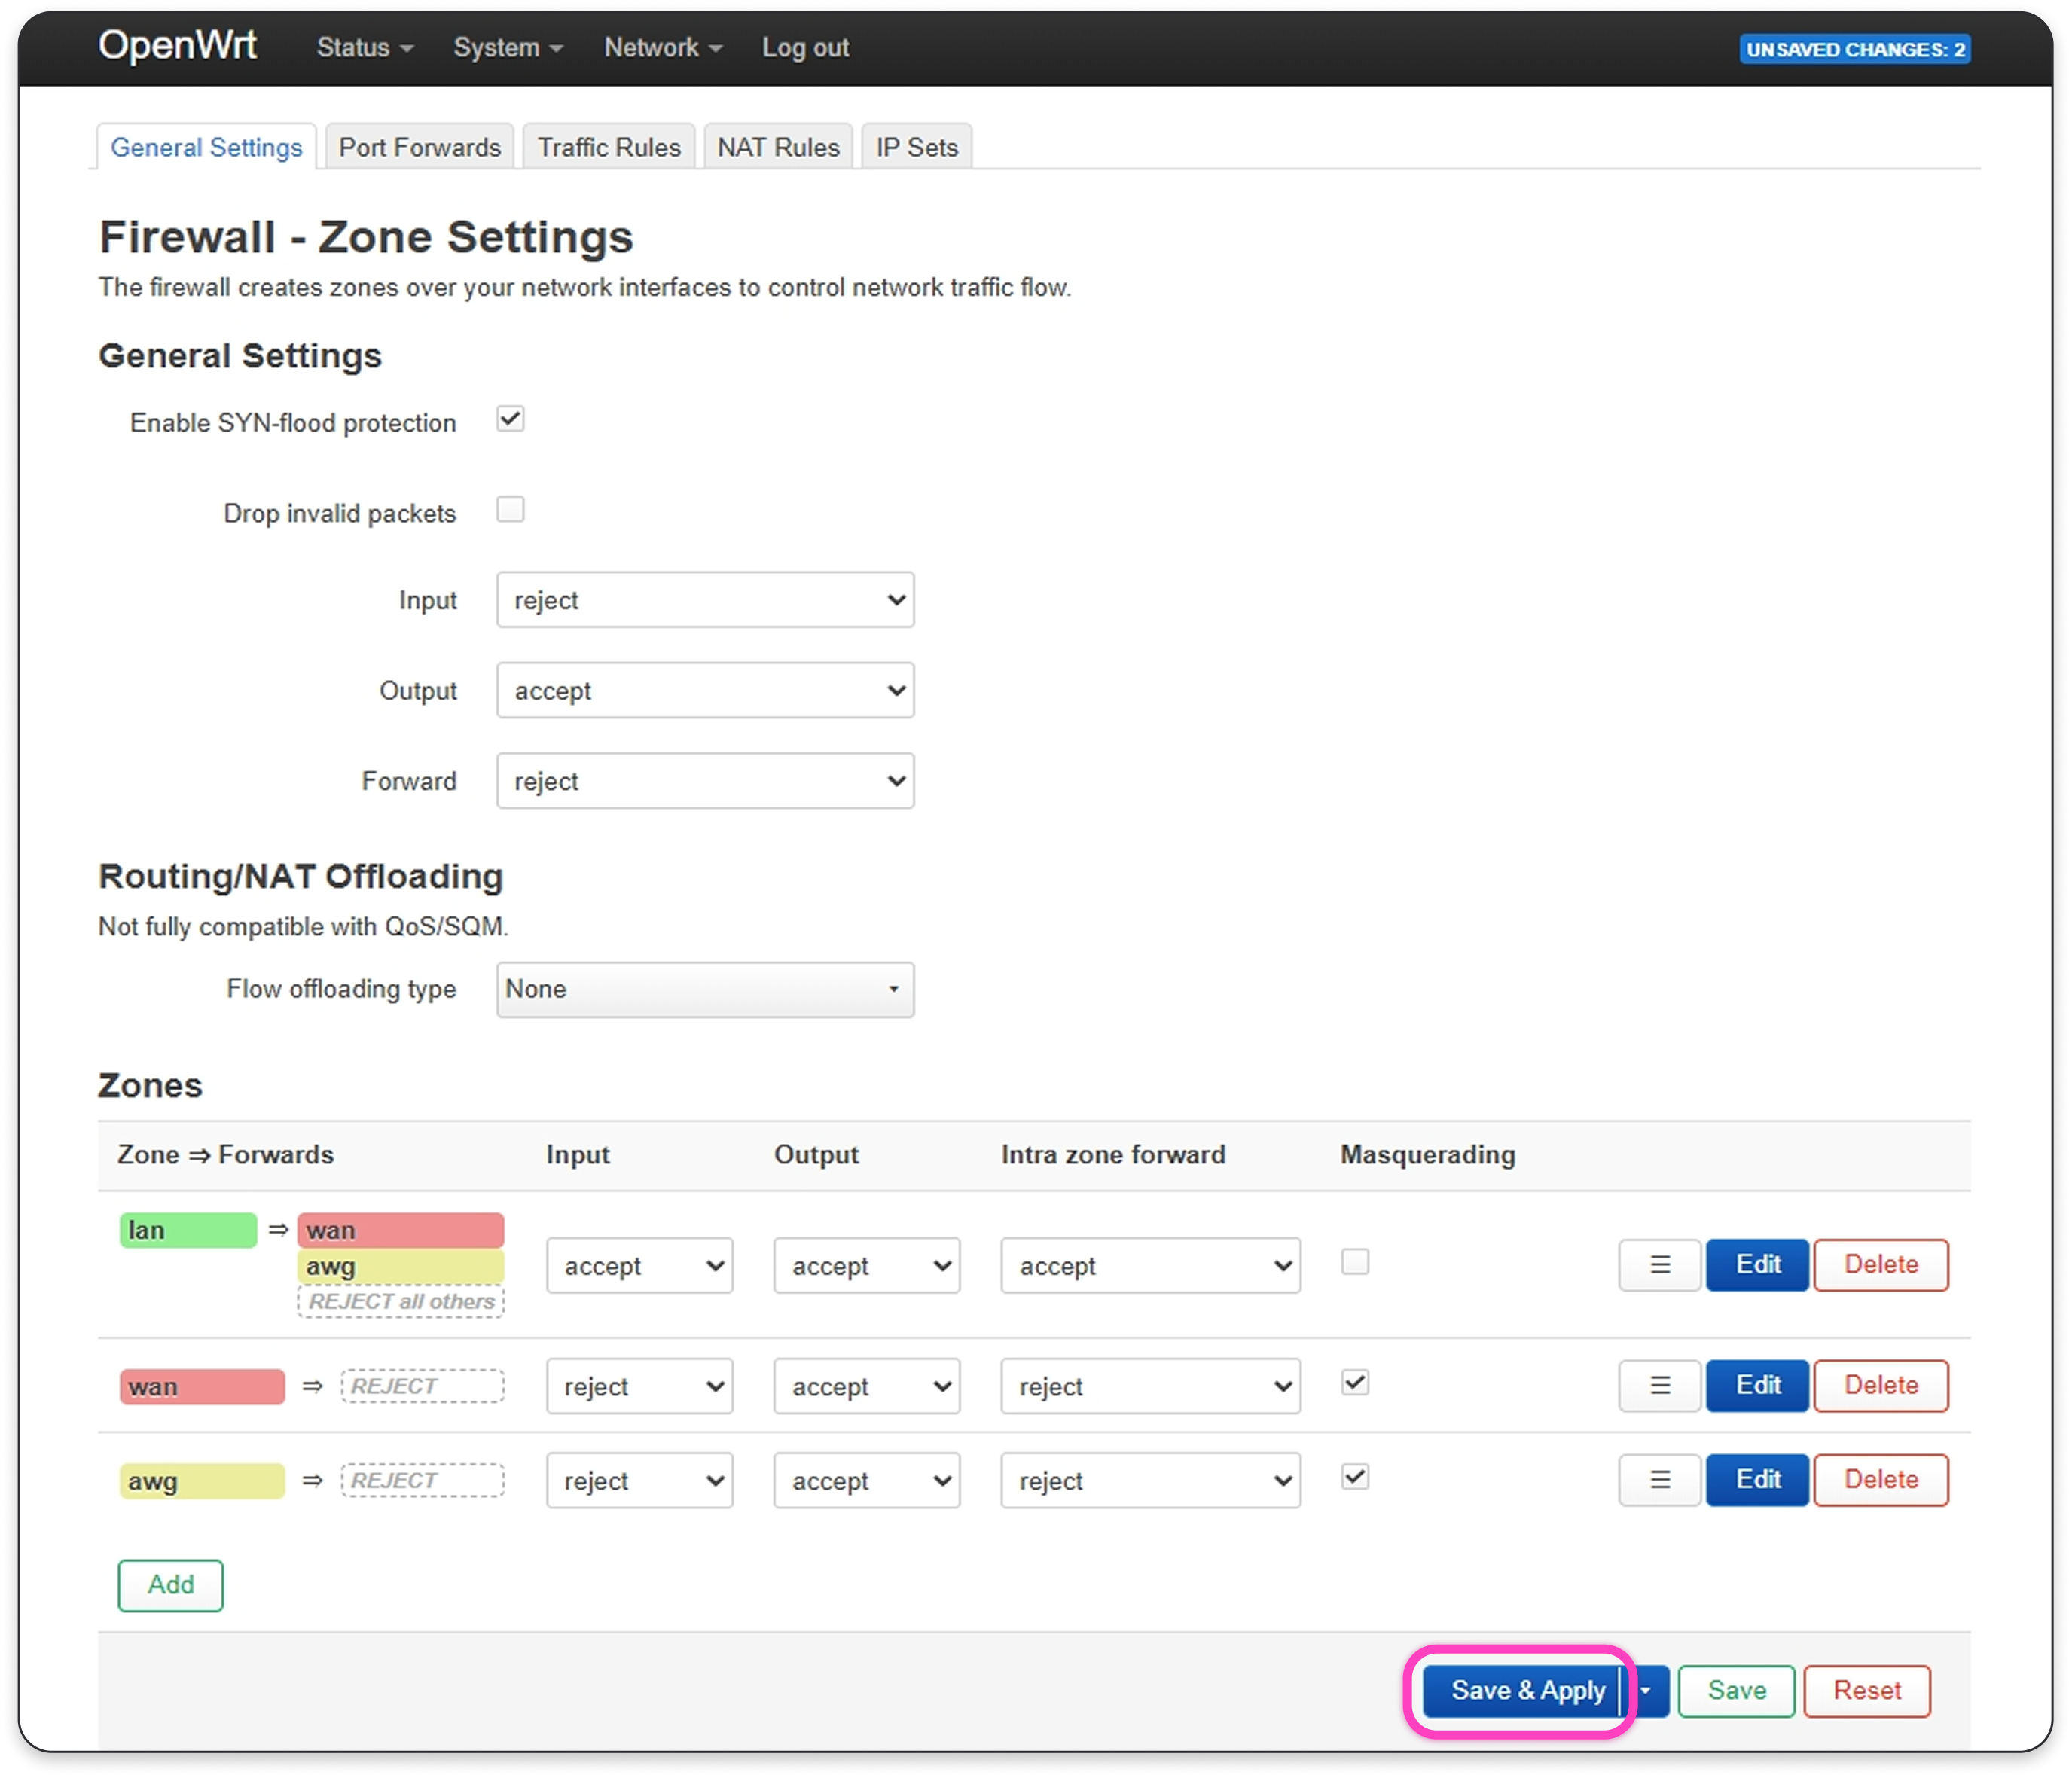
Step 4. Configure the Router Firewall
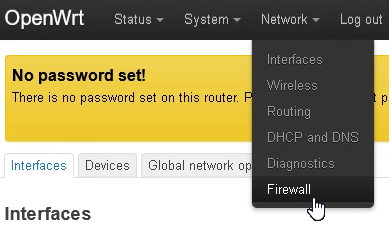
- Go to Network → Firewall.
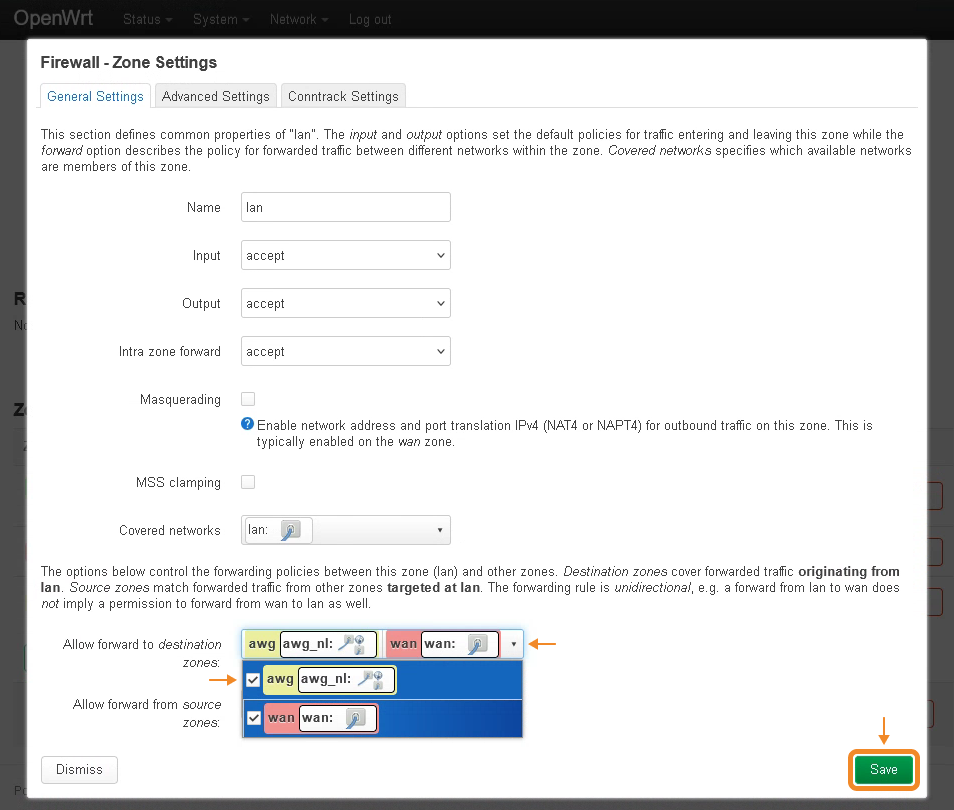
- Click Edit next to the lan zone.

- In Allow forward to destination zones, select the firewall zone you created earlier, then click Save.
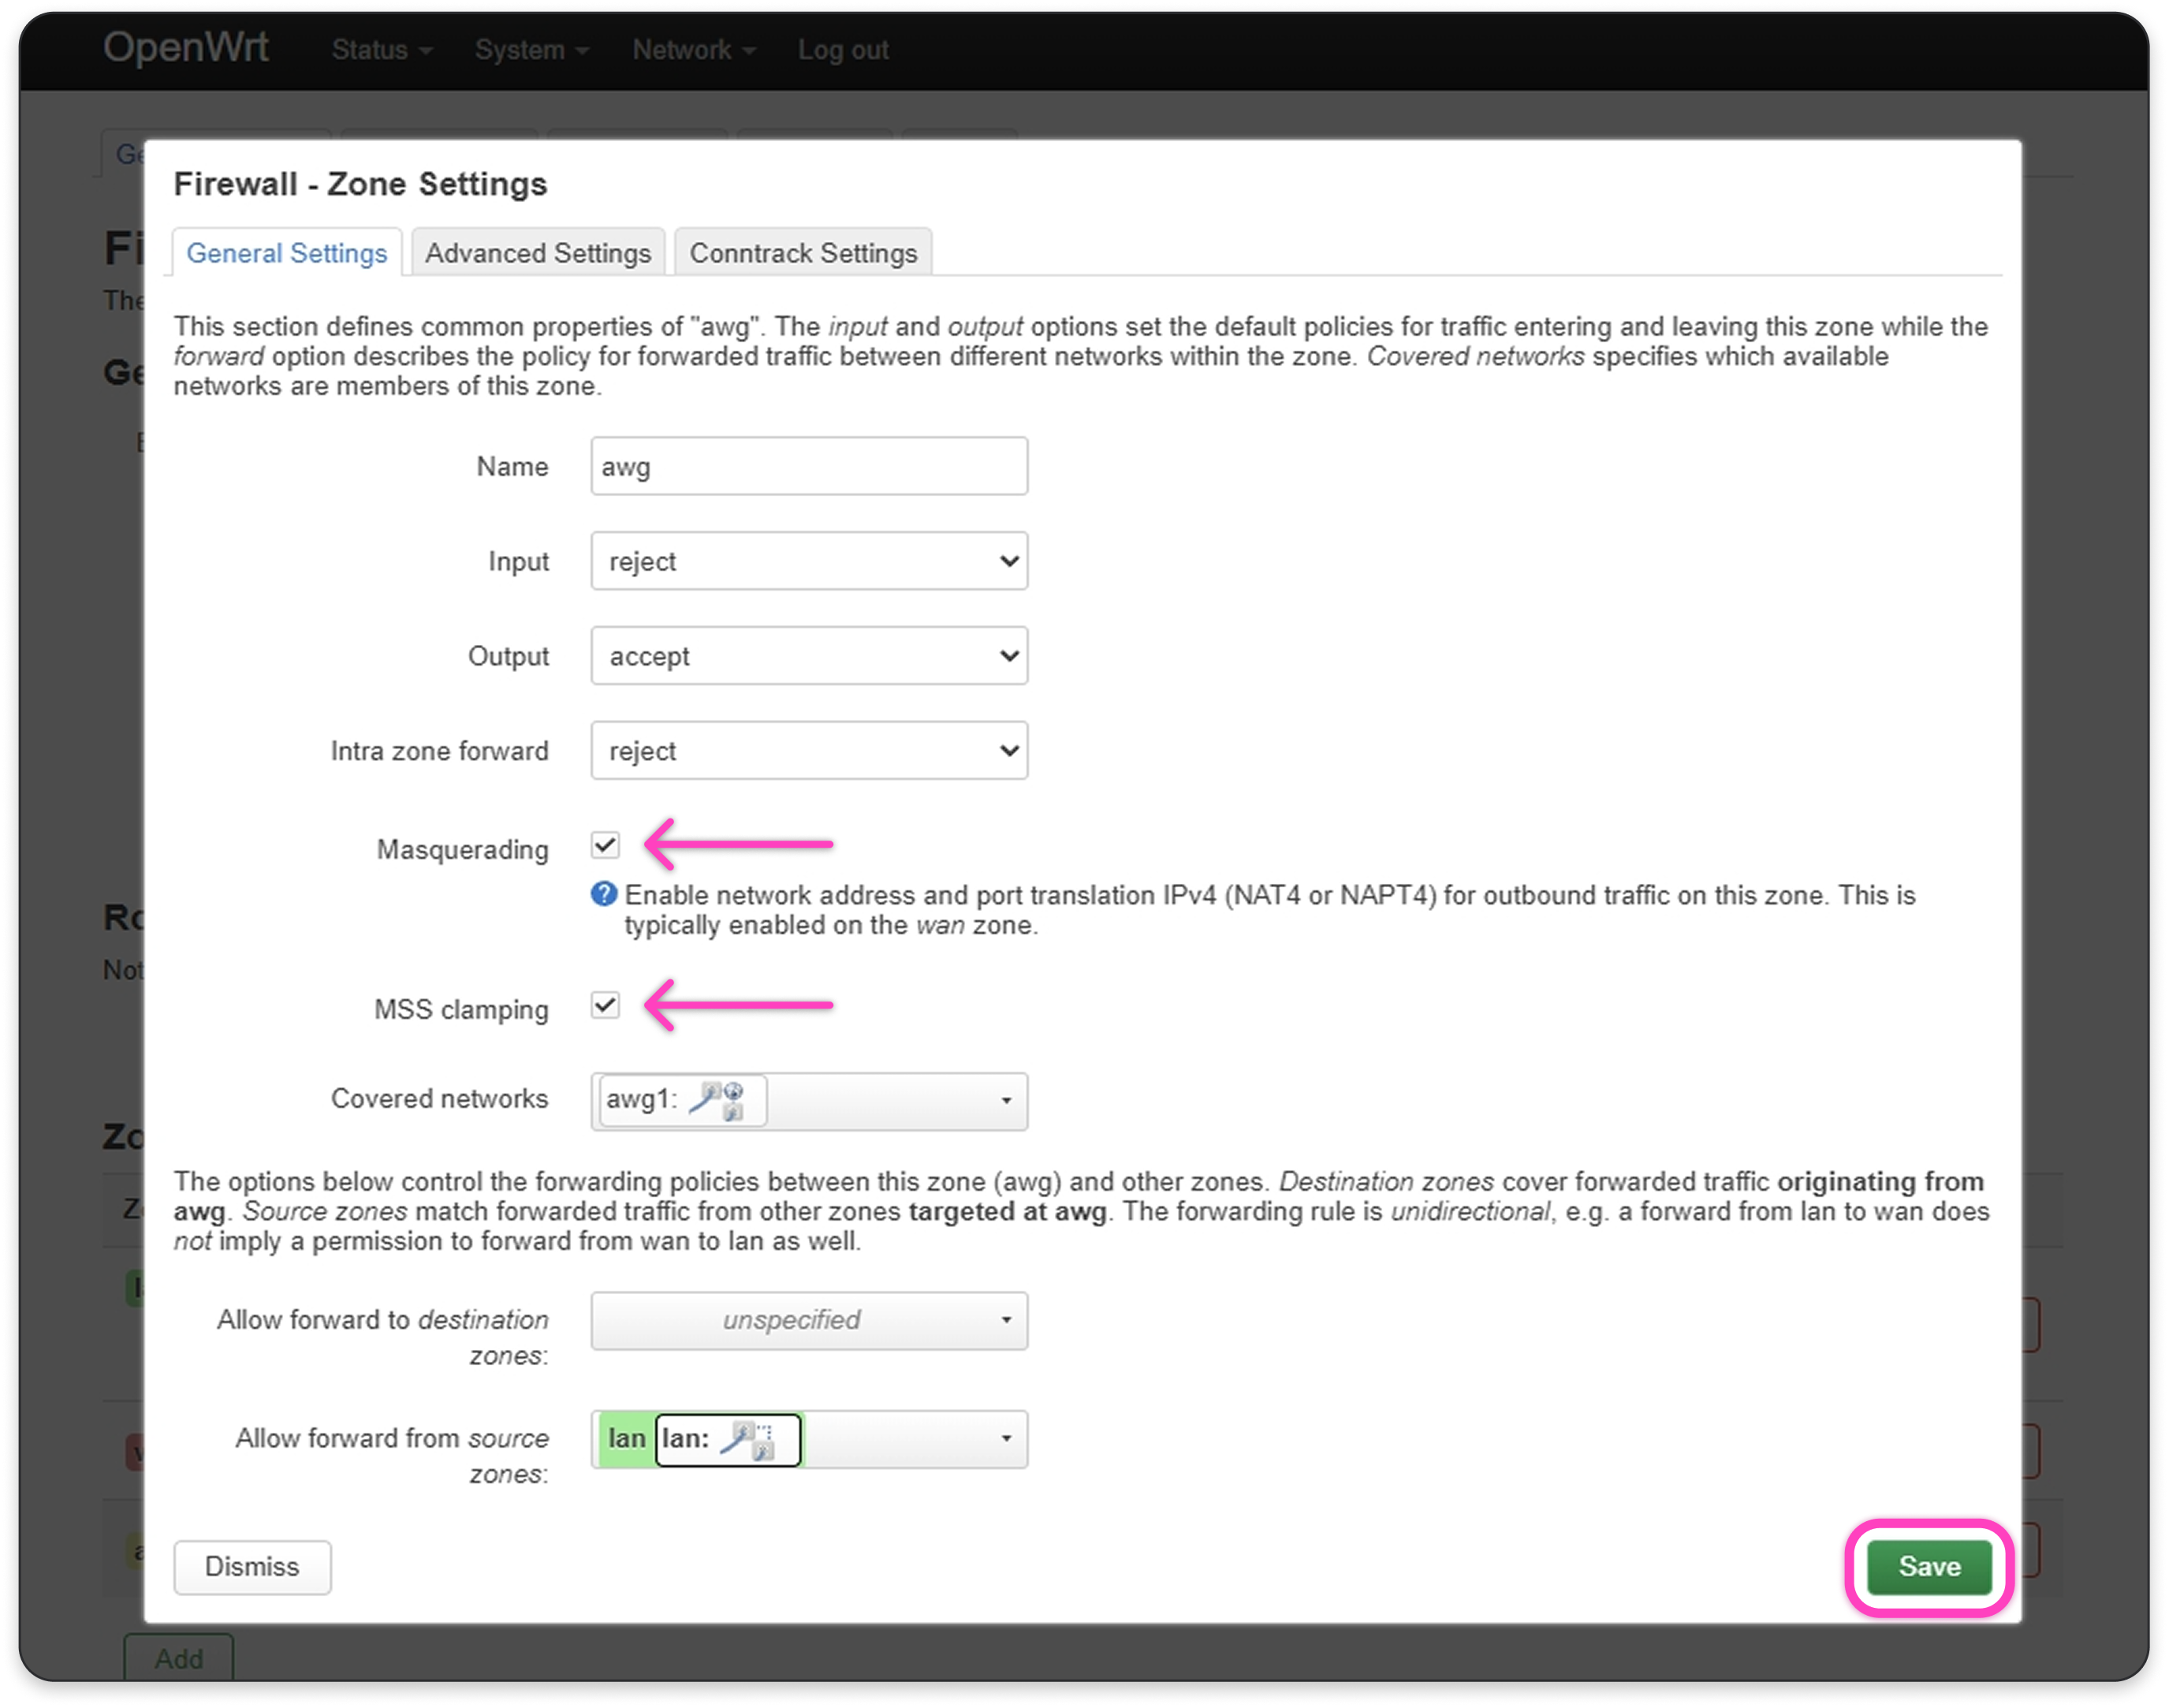
- Click Edit next to the firewall zone you created earlier (for example,
awg).
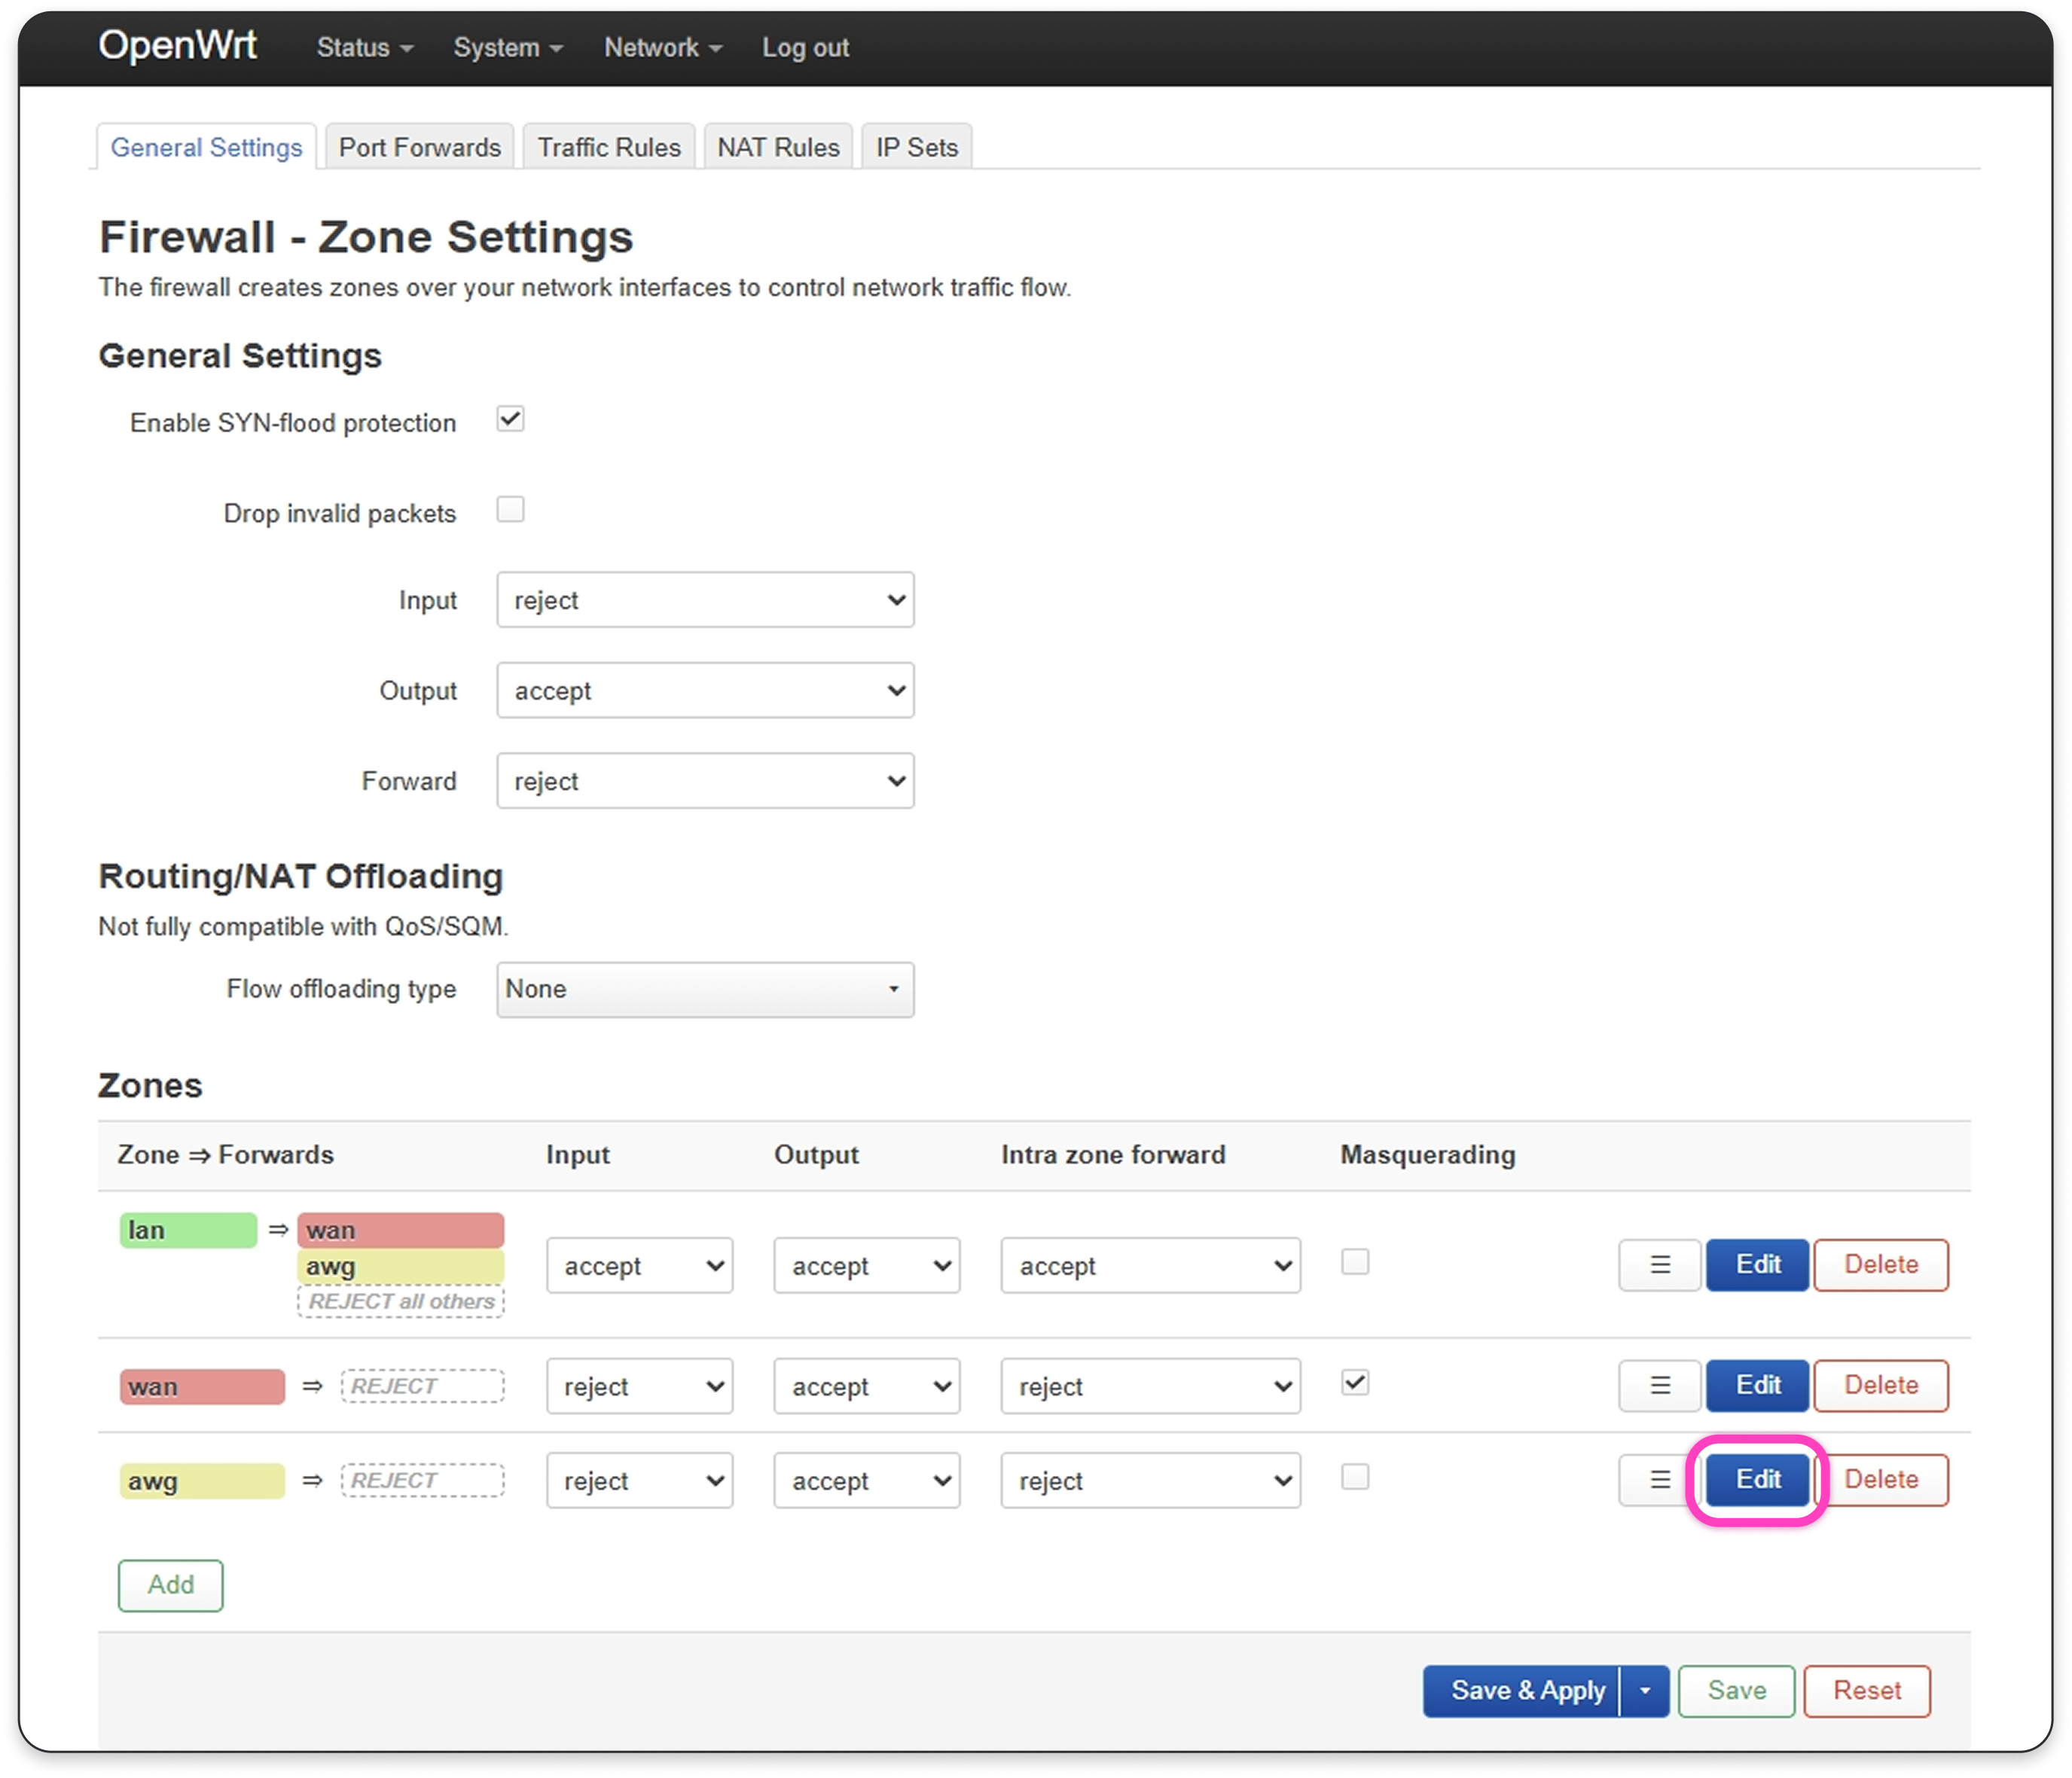
- Enable Masquerading and MSS clamping, then click Save.
- Click Save & Apply.
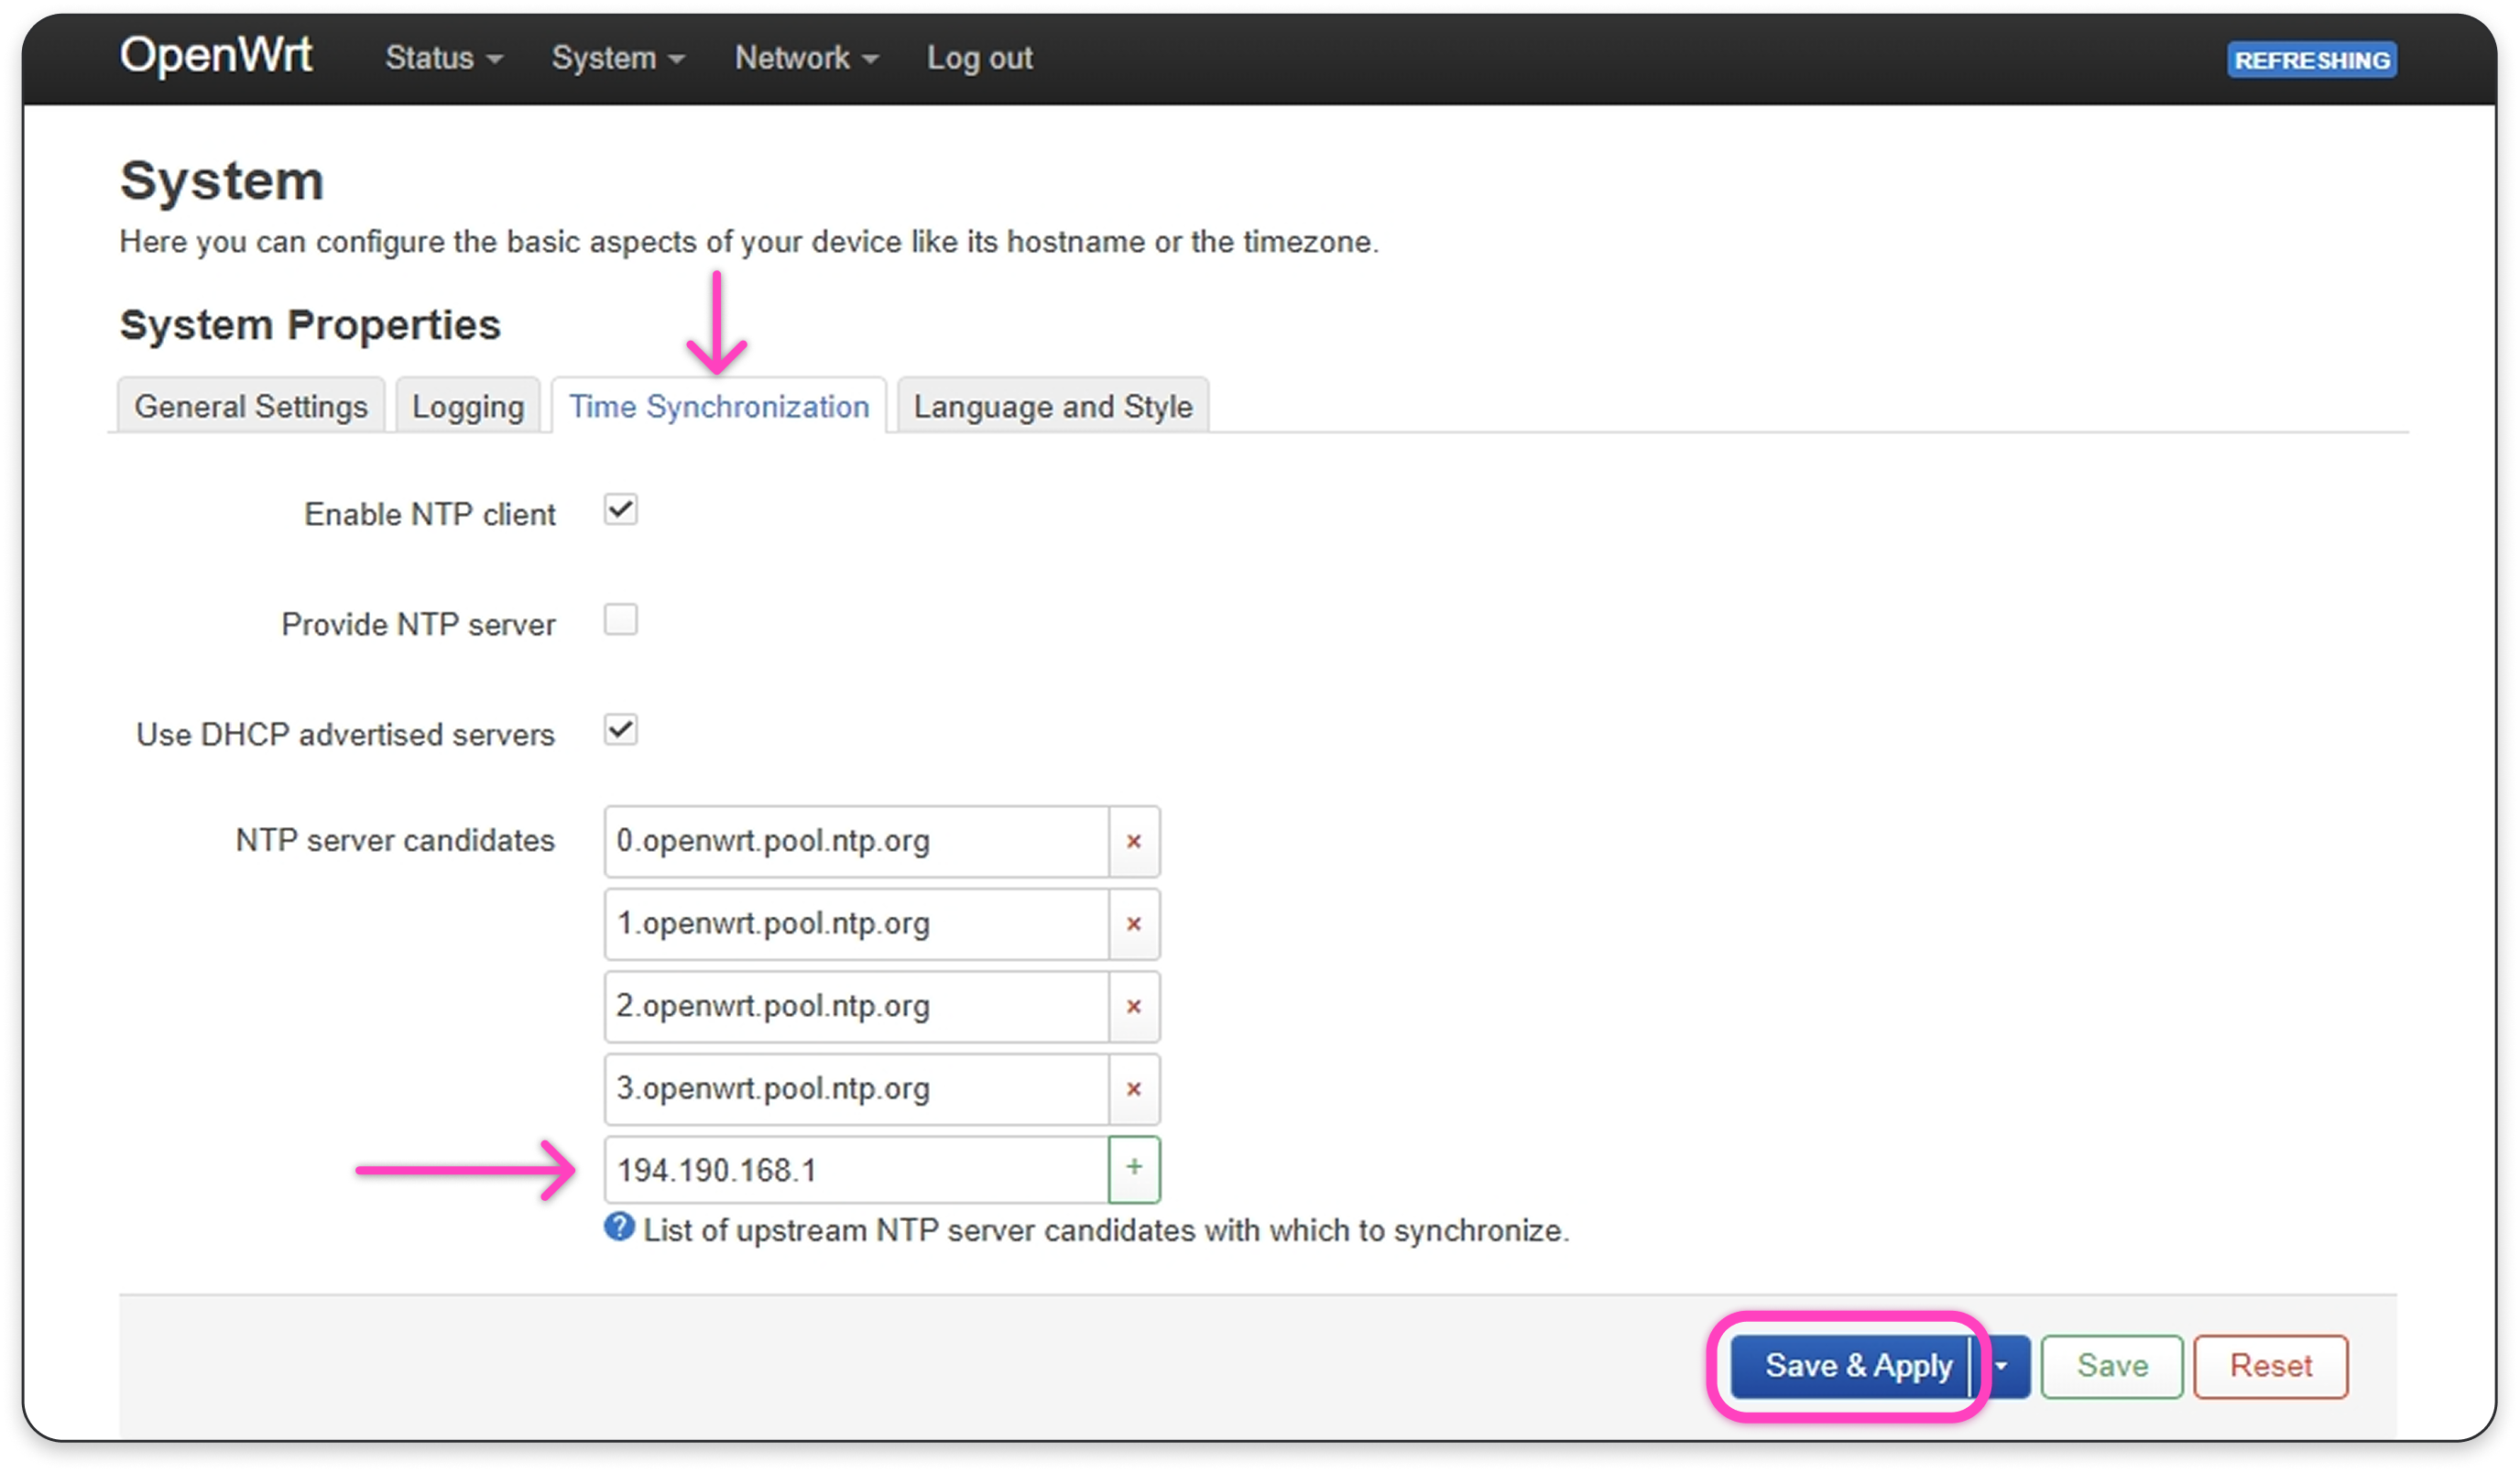
Step 5. Synchronize the Time on the Router
- Go to System → System.

- Go to the Time Synchronization tab, add the IP address of a time synchronization server (for example,
194.190.168.1), and click Save & Apply.
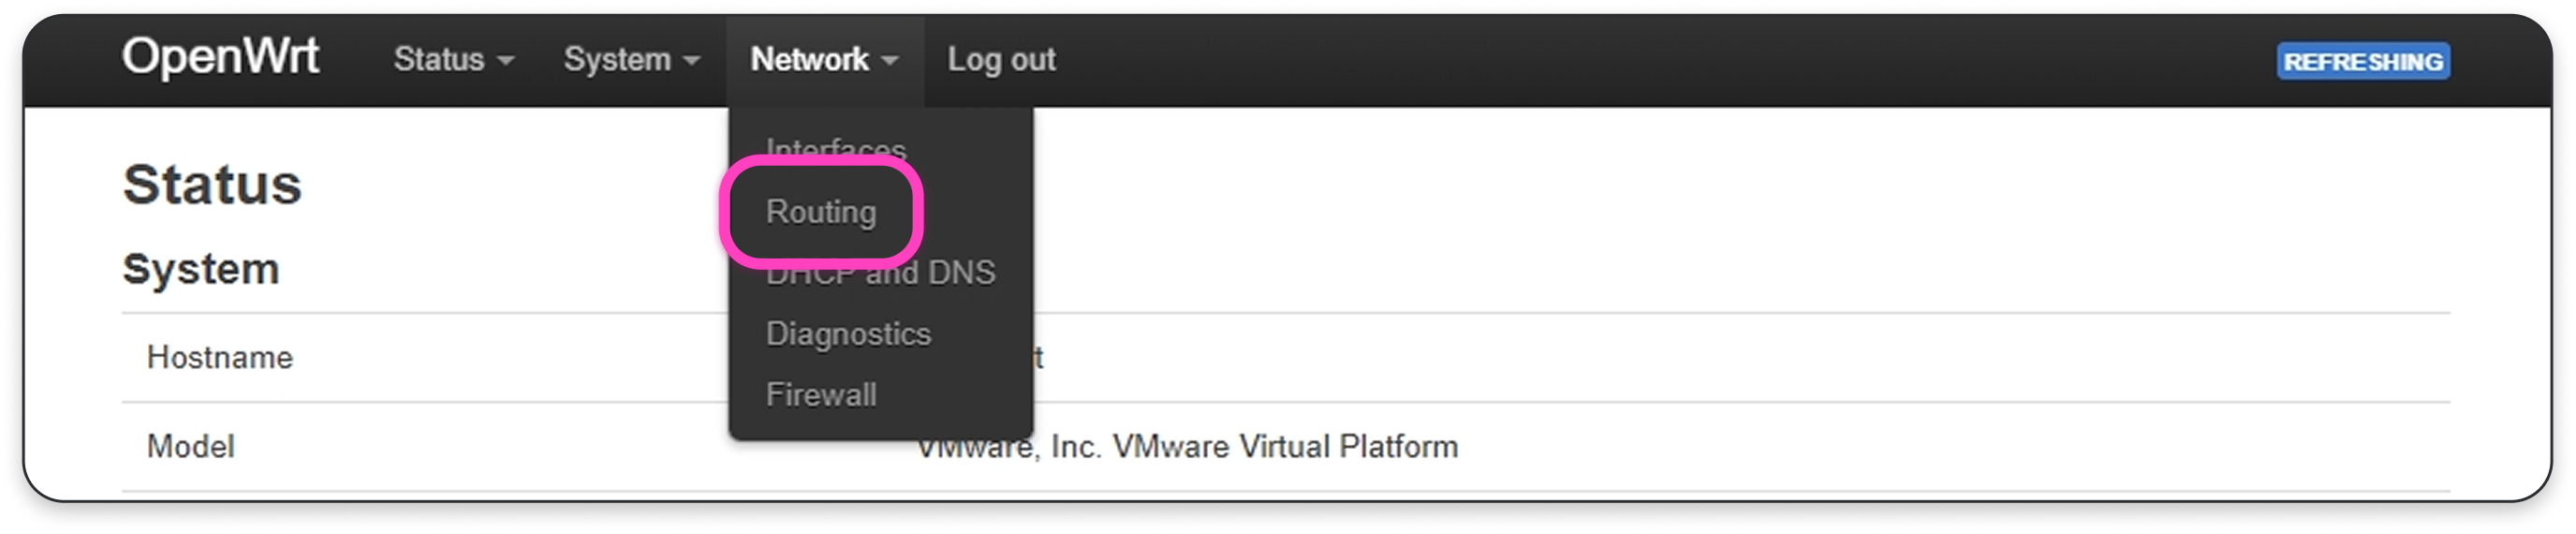
Step 6. Configure Routing
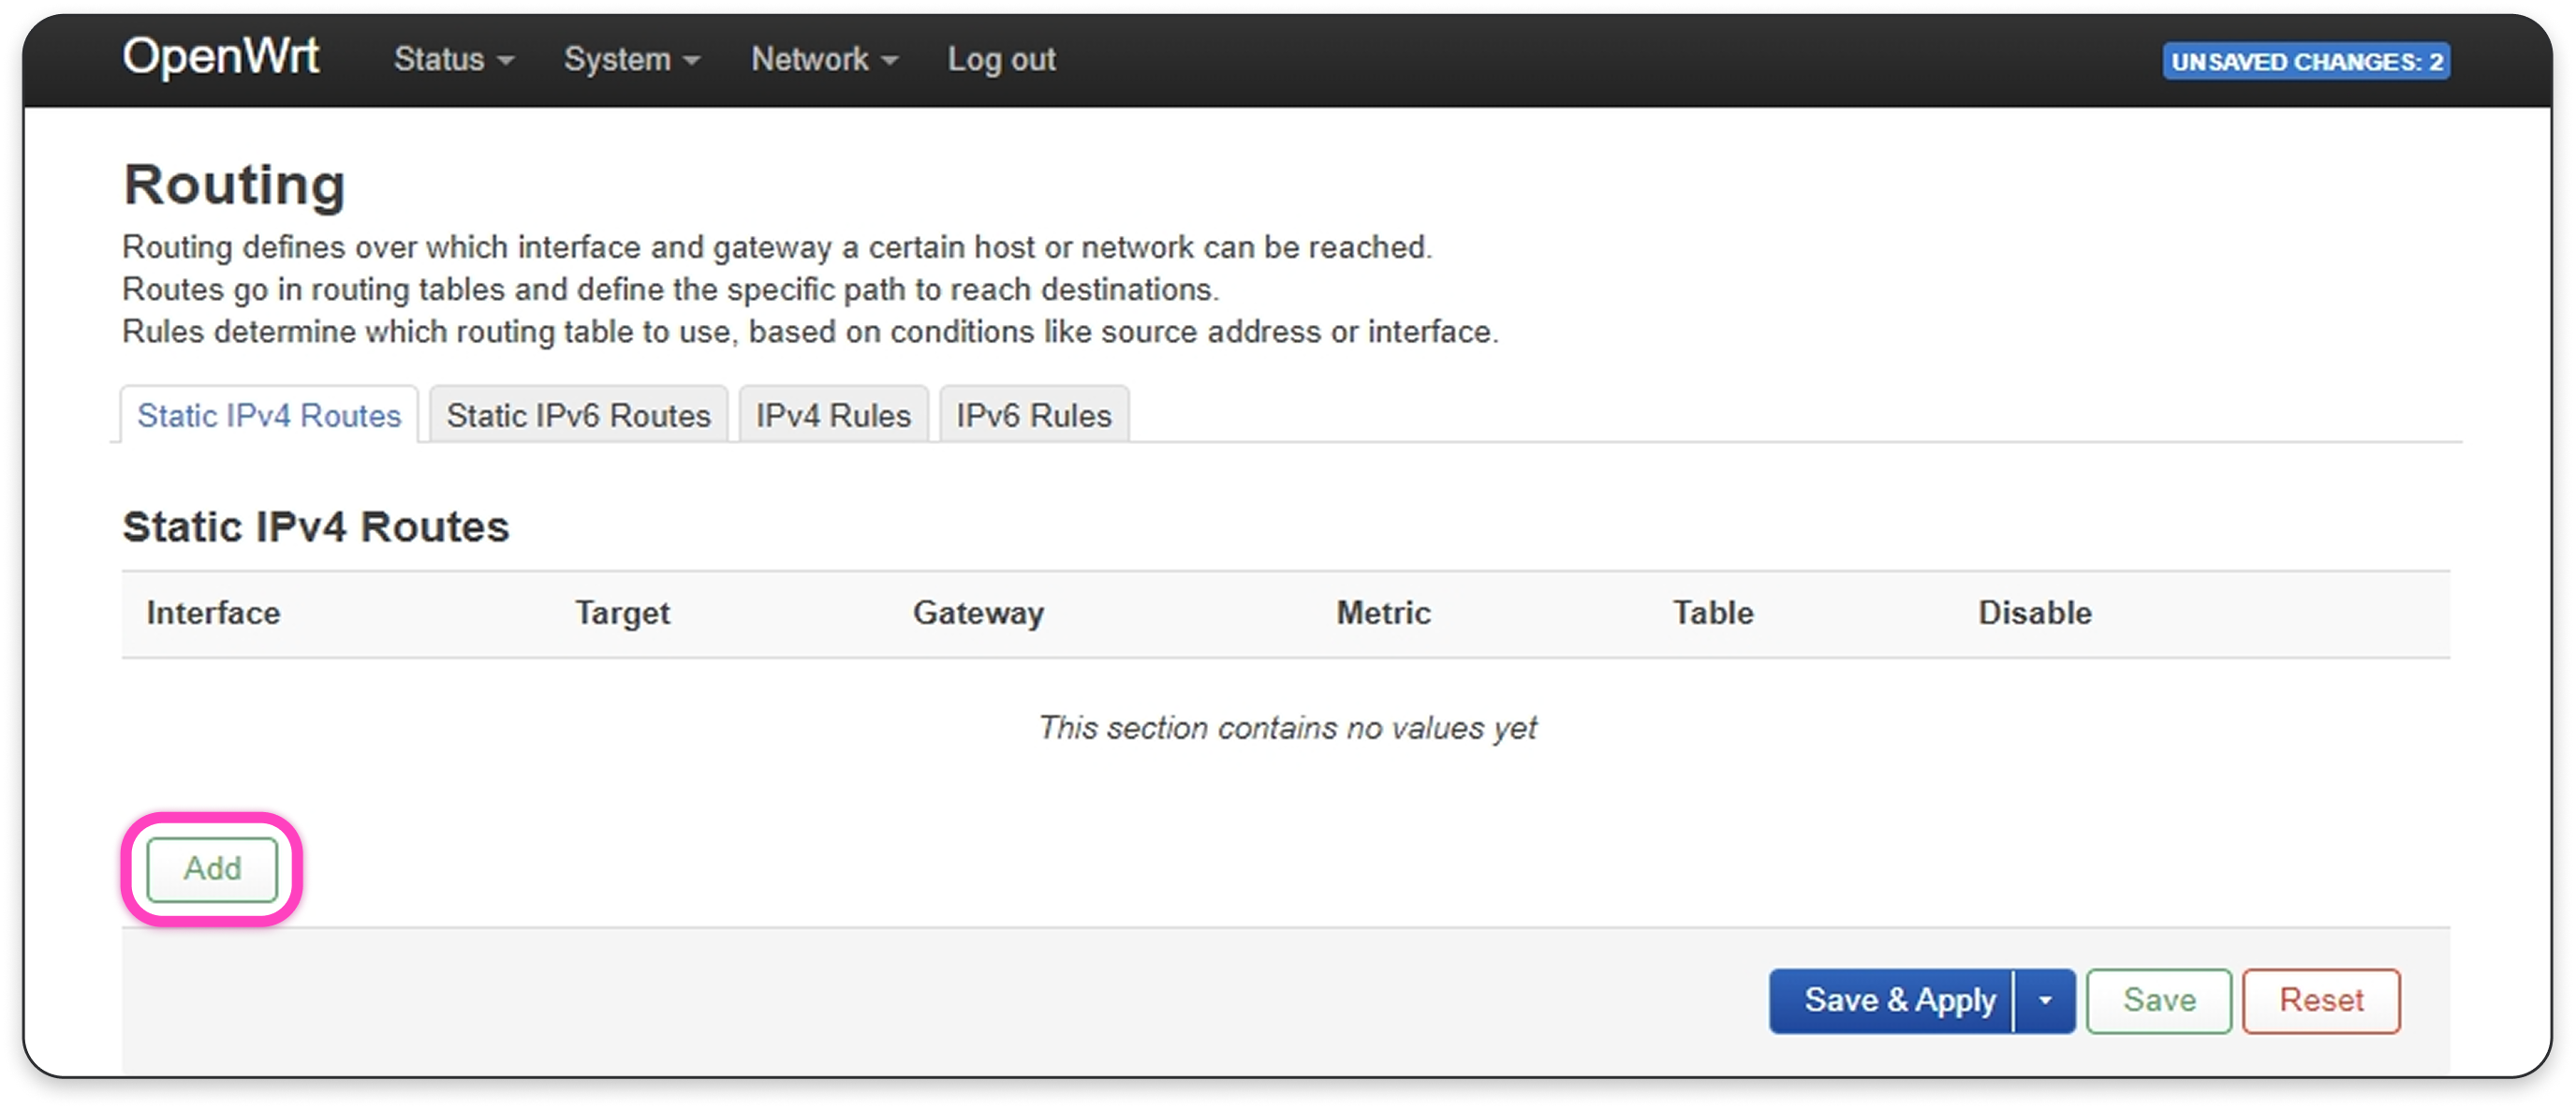
- Go to Network → Routing.
- Click Add to create a new rule.
- In Interface, select wan. In Target, enter the IP address of the time synchronization server and add
/32after it.

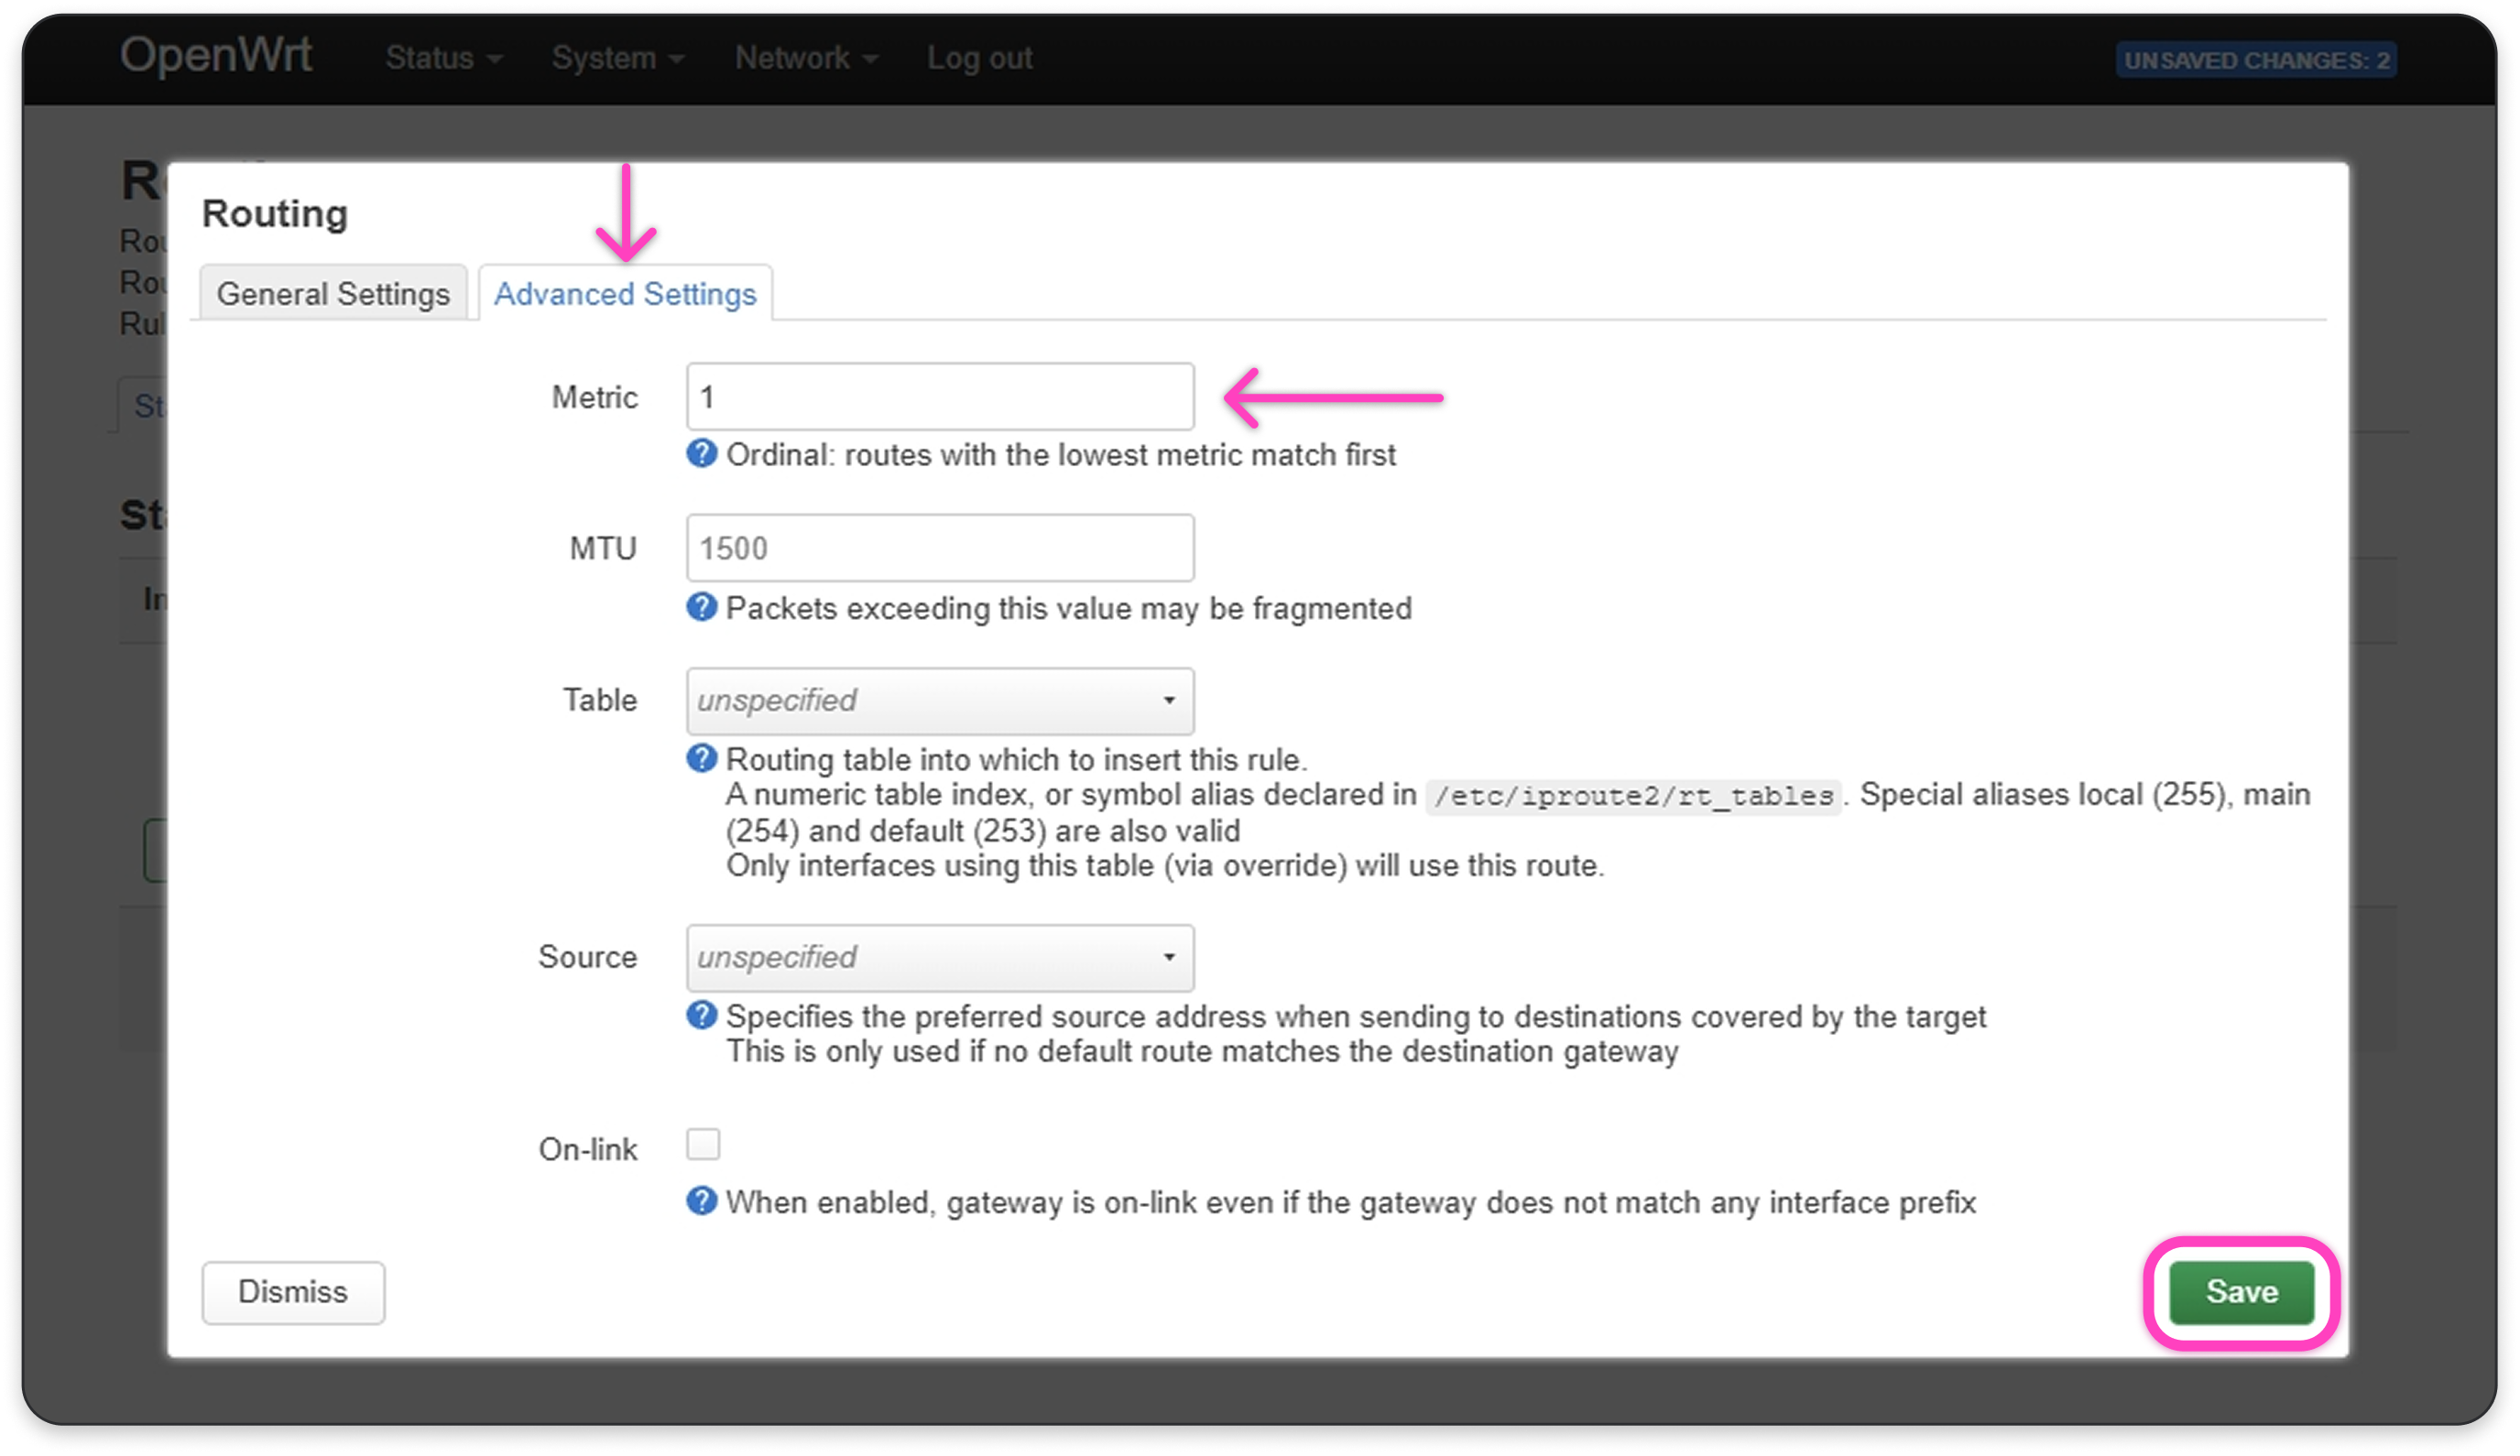
- Go to the Advanced Settings tab, set Metric to
1, and click Save.
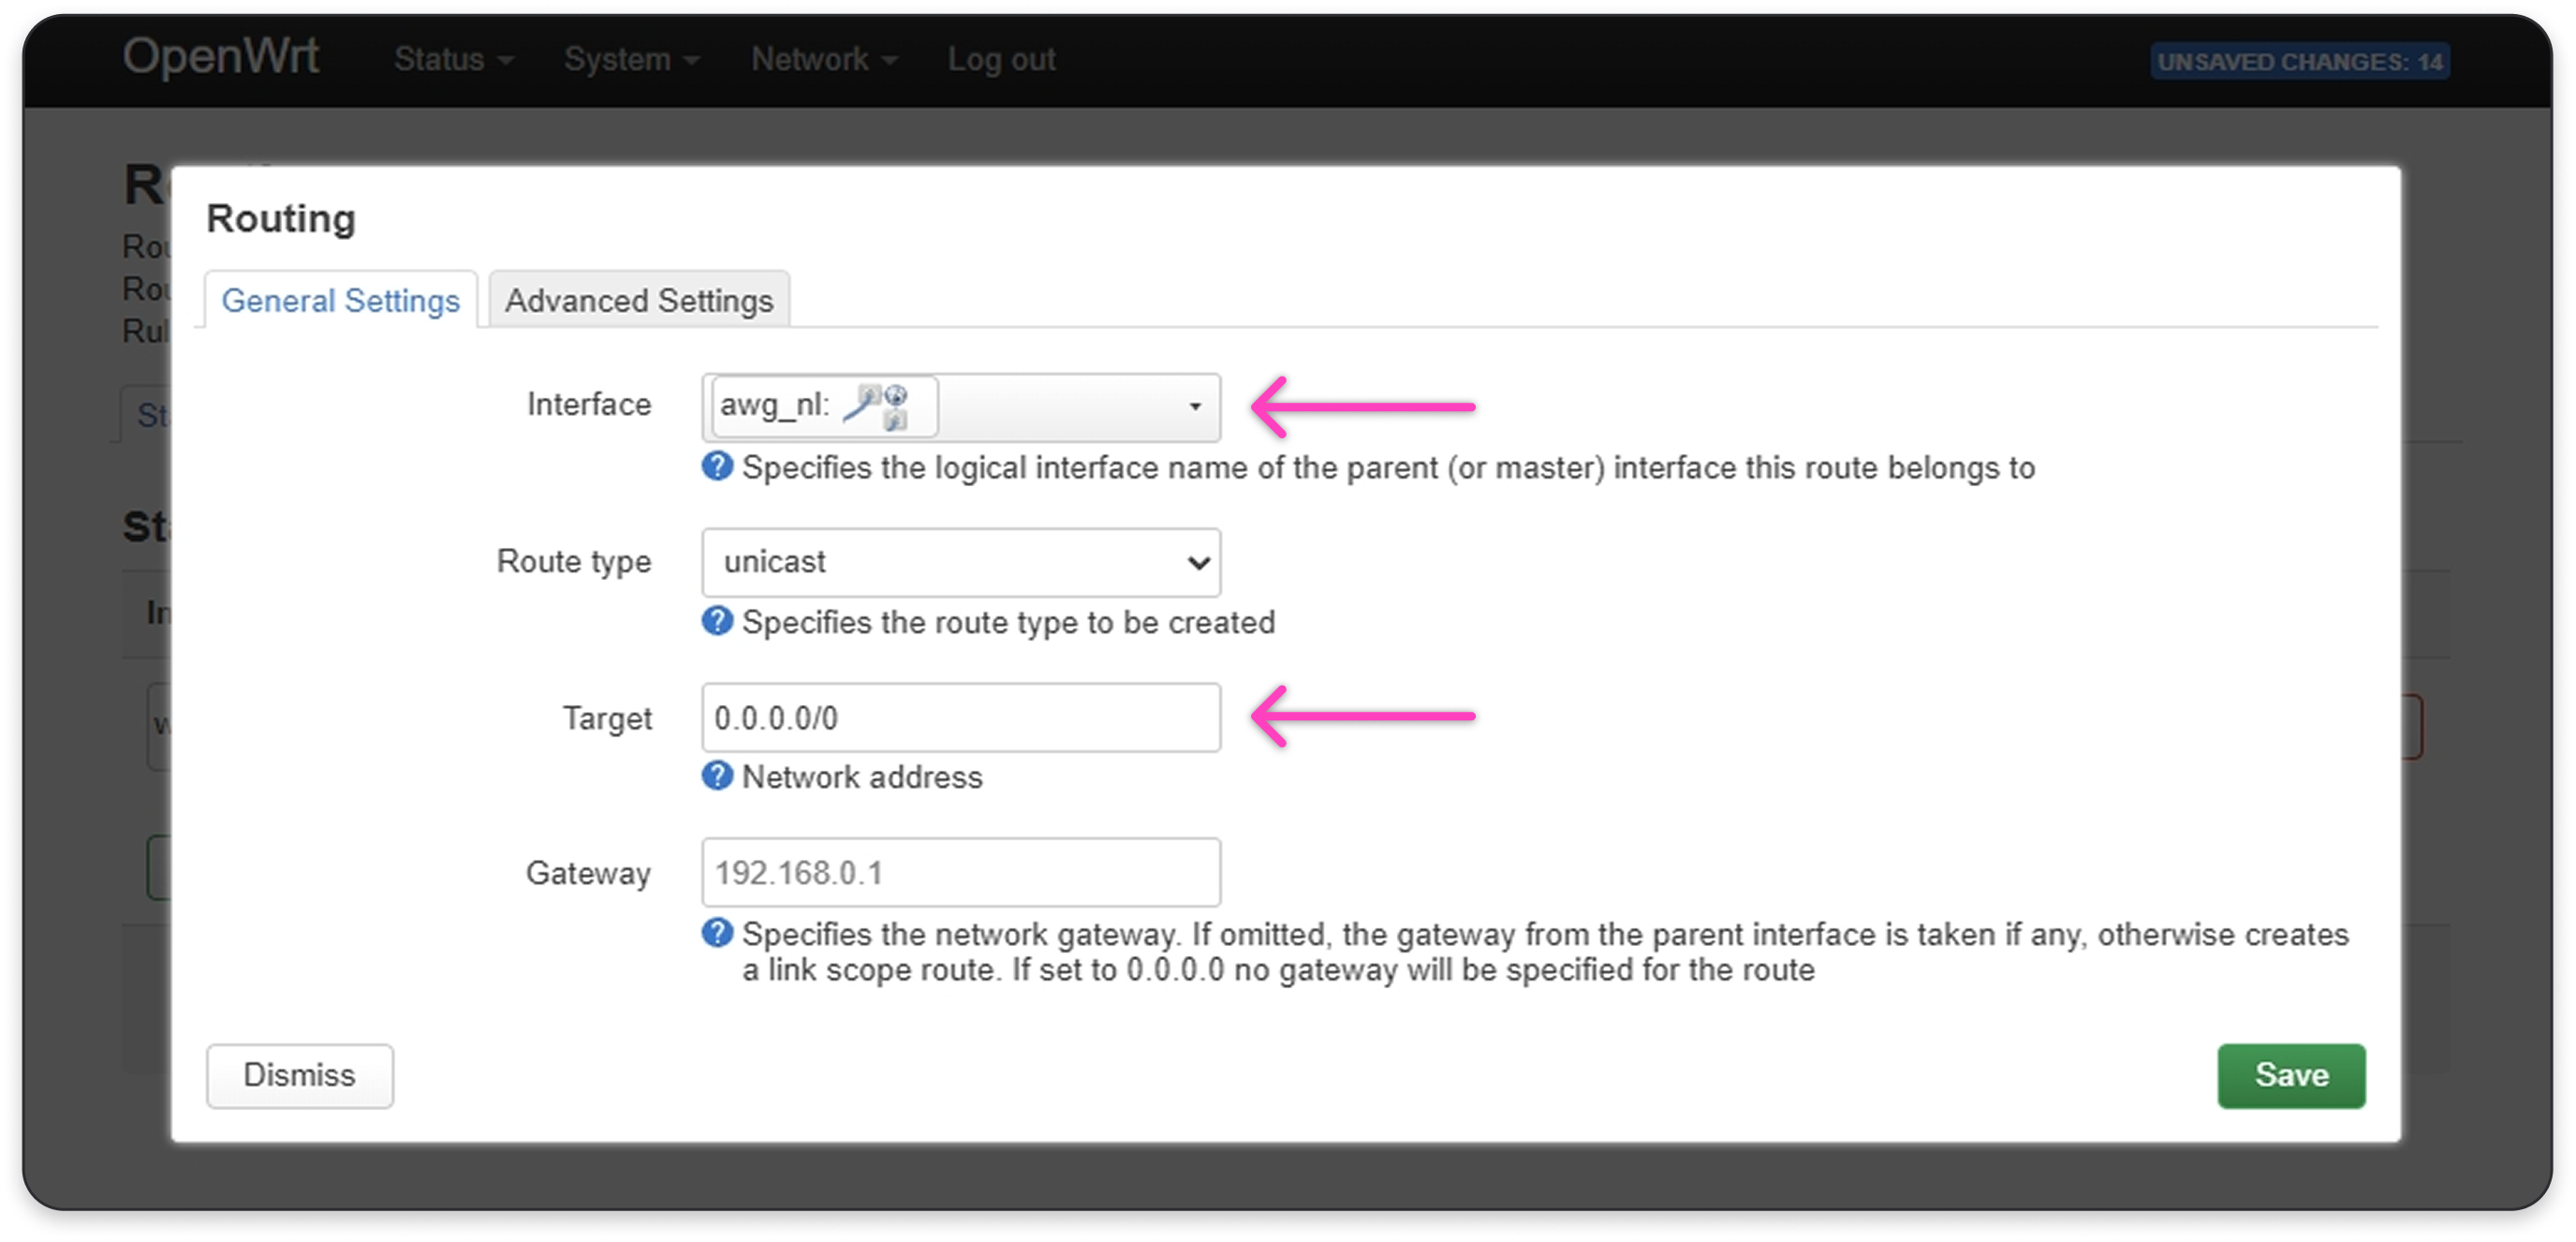
- Click Add to create one more rule.

- In Interface, select your VPN interface. In Target, enter
0.0.0.0/0.
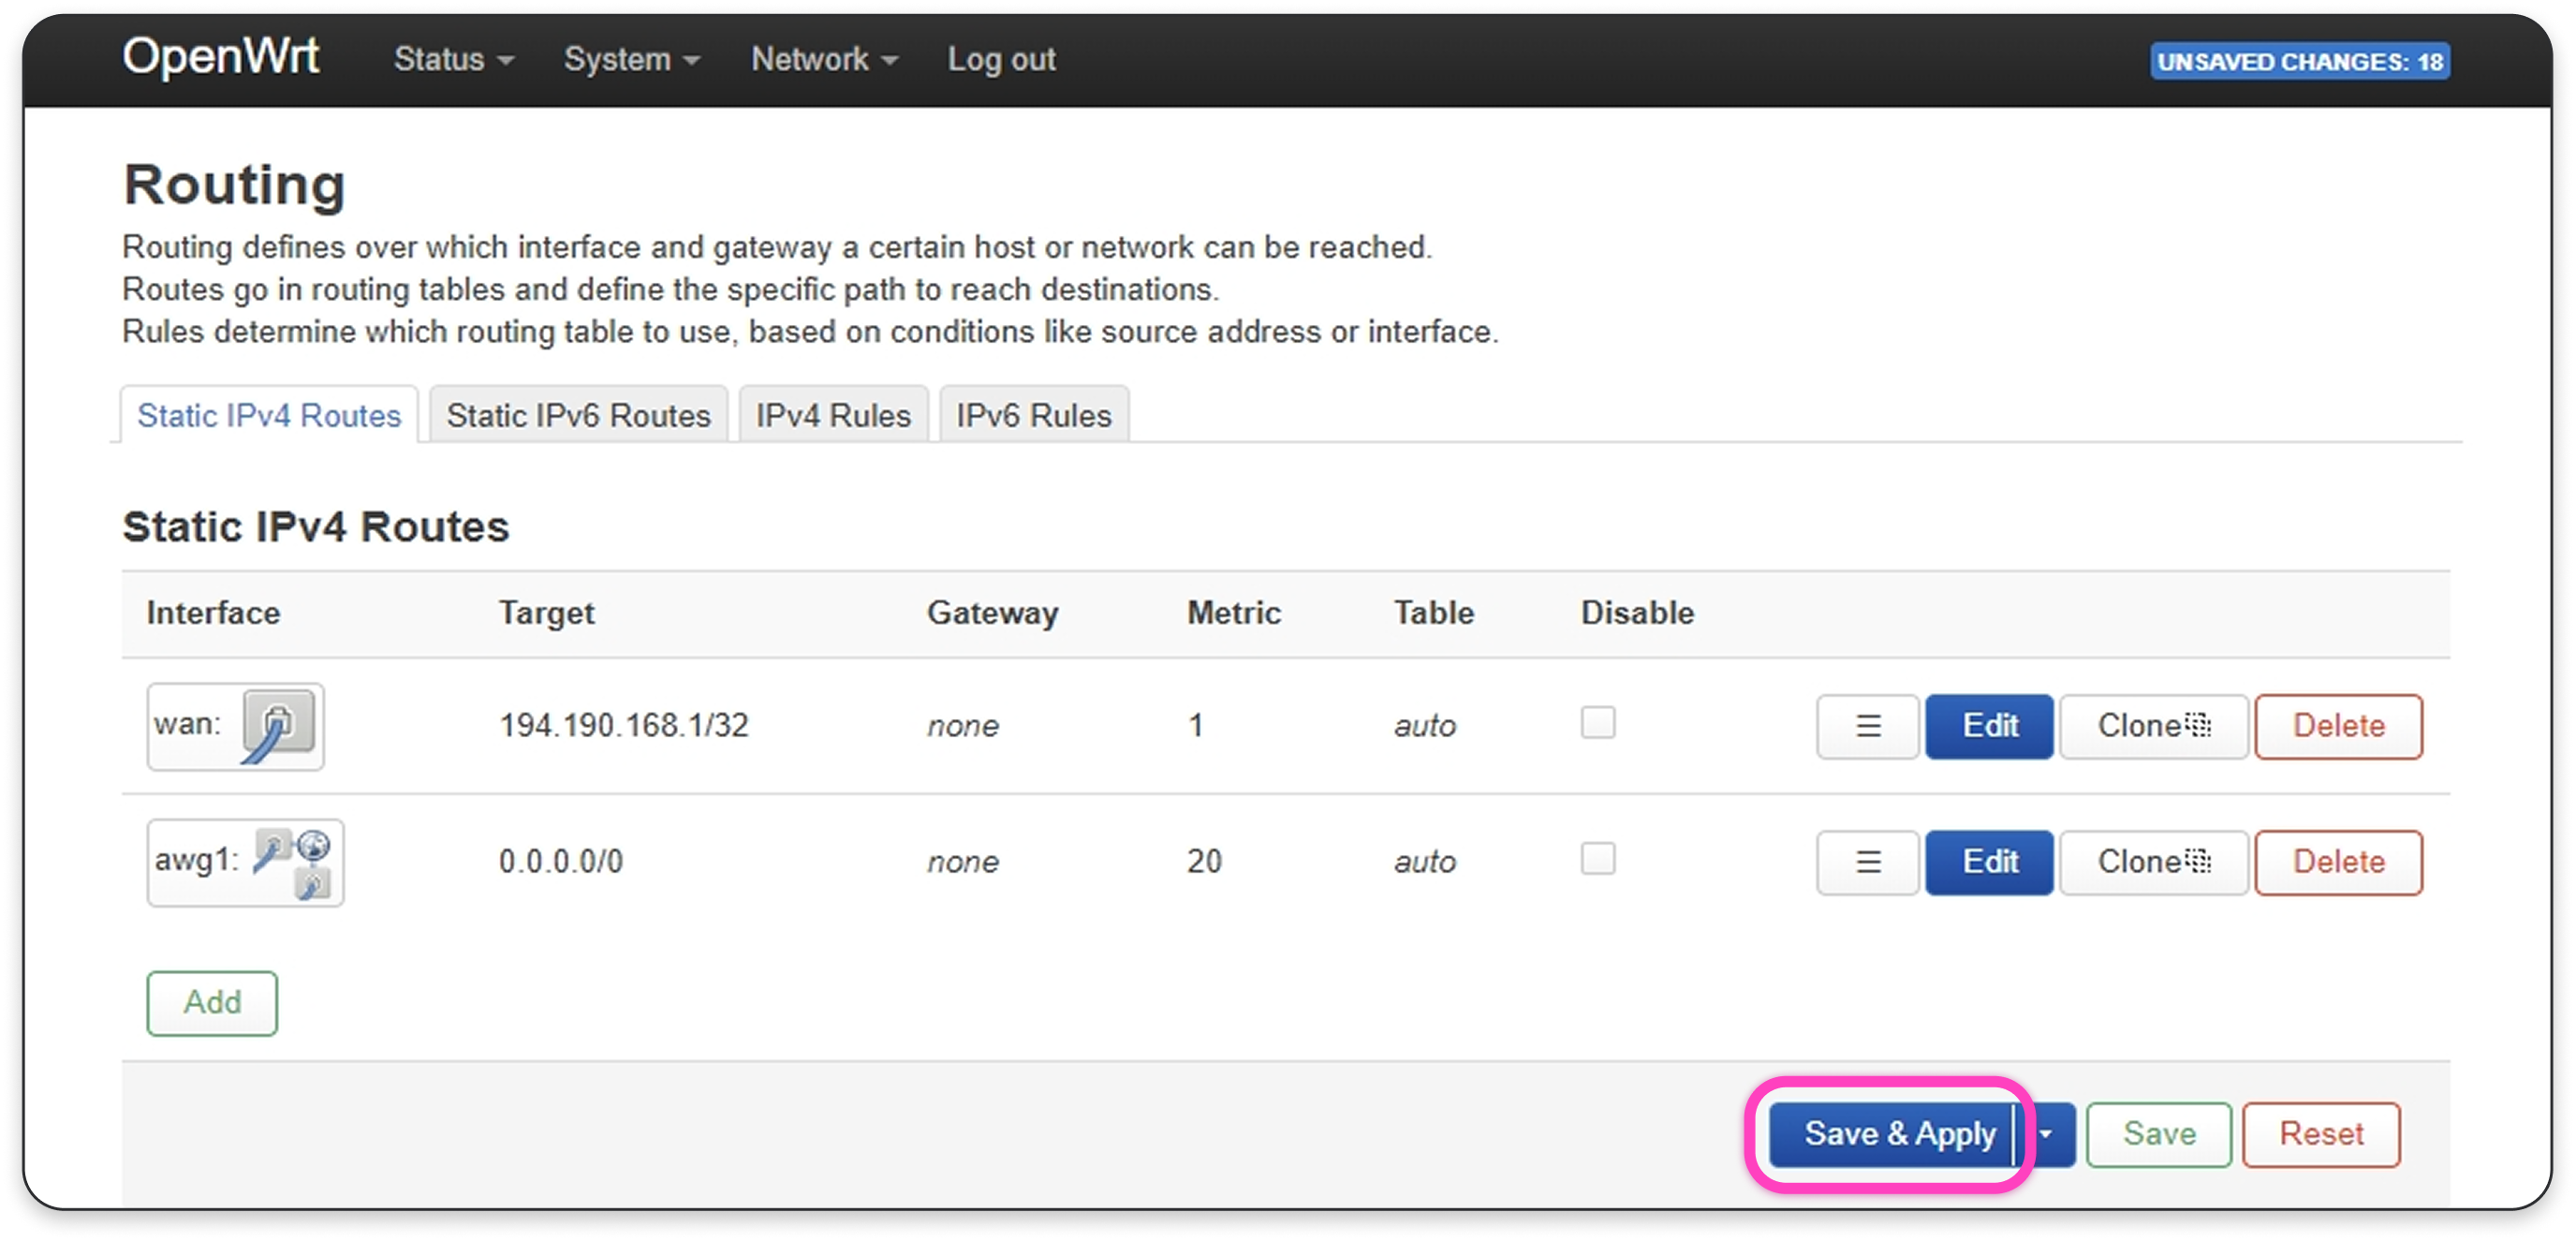
- Go to the Advanced Settings tab, set Metric to
20, and click Save.

- Click Save & Apply.
- Hover over System in the top menu and click Reboot.

- Click Perform reboot.
How to Update the VPN Settings Using a Different Configuration File
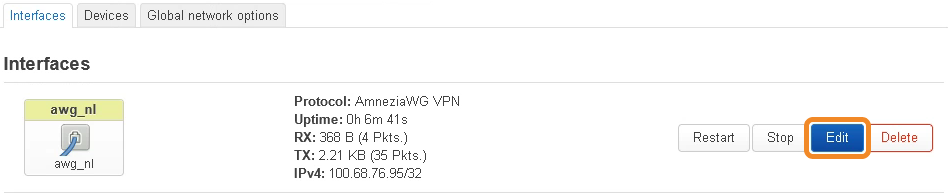
- Go to Network → Interfaces.
- Click Edit next to the VPN interface you created earlier.
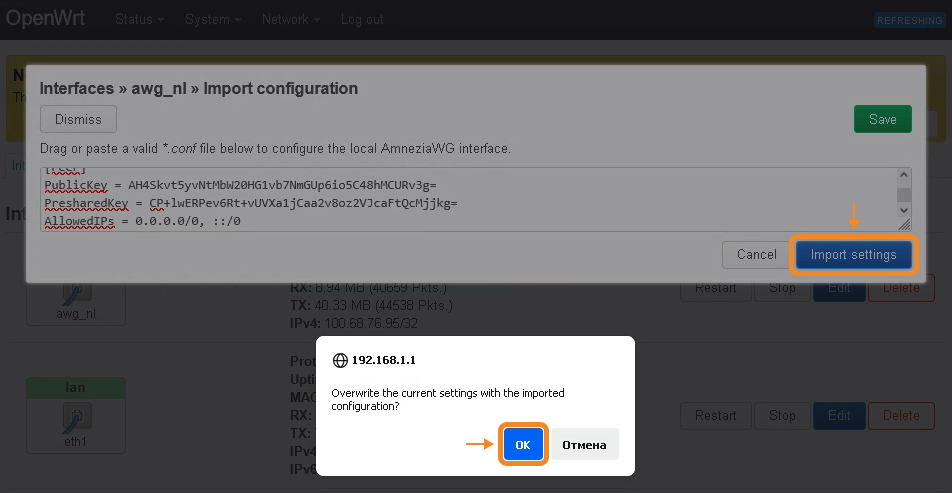
- Click Load configuration.
- Paste the full contents of the new configuration file or drag and drop the file into the window, then click Import settings. Click OK to confirm the changes.
- On the Peers tab, click Delete next to the old configuration and Edit next to the new one.
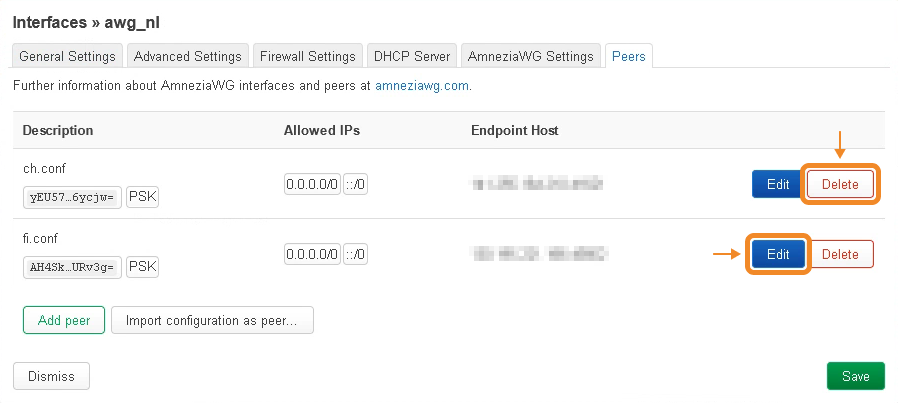
- Enable Route Allowed IPs, click Save, then click Save again.
- On the Interfaces tab, click Save & Apply.
